
I love watching The Midnight Quilt Show – Angela Walters’ weekly YouTube series. It’s a quick bit of fun to look forward to mid-way through the week. The part I like the best is seeing how she decides to quilt the quilts because I always get so many ideas.
This quilt is the Criss Cross quilt from the Holiday Gift Along series. The video was published on 11/28/2018 and includes a free pattern. The moment I saw it I started planning to make it both because I had a bunch of left over strips from a jelly roll laying around and because the quilting looked like a lot of fun. I pieced the top during my January quilt retreat. It came together relatively quickly, though I made it hard on myself by trying to use up scraps. With 13″ pieces required – actually bigger due to the angled cuts – it is kind of hard to use smaller pieces.
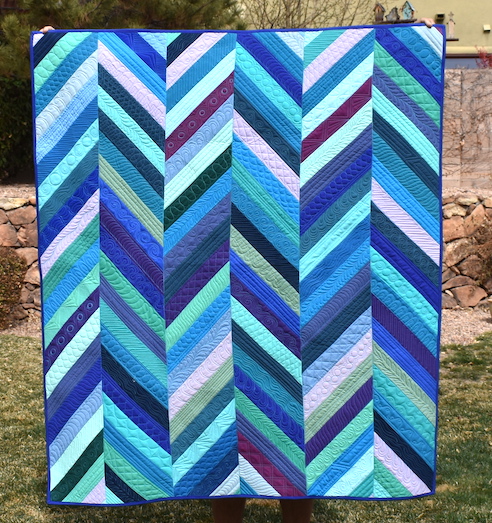
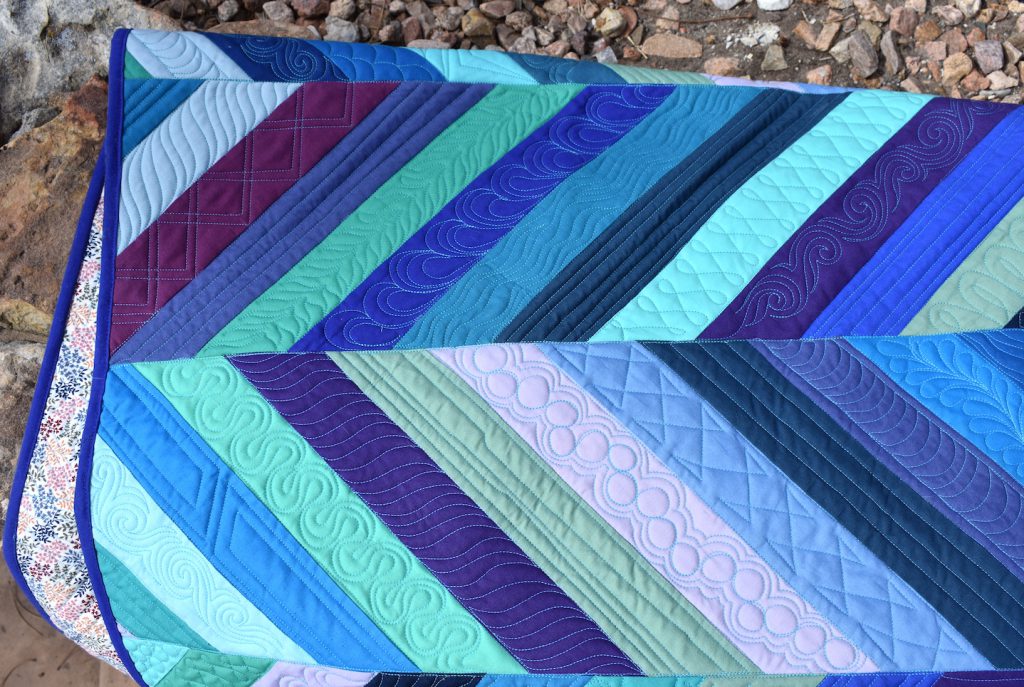
But I persevered, finished the top and got it all quilted. Here is the finished top:
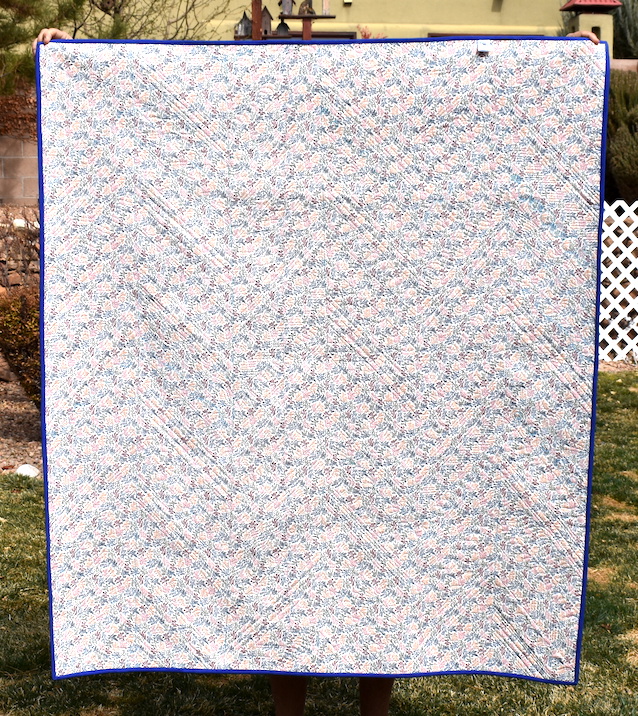
This was entirely sewn from my stash, including the backing, batting and binding. I tried iron-on tape for the first time to join up pieces of batting and it worked really nicely. I also used a backing from my stash which has colors that match but I’m not sure it’s my favorite:
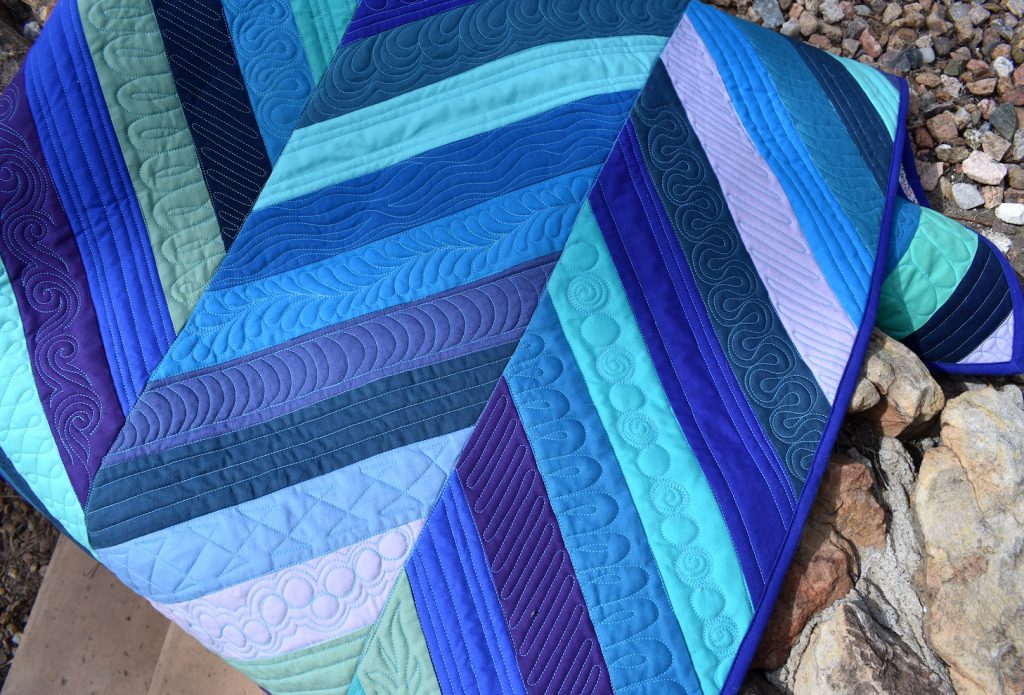
I did enjoy doing all the quilting. Here are a bunch of close ups:
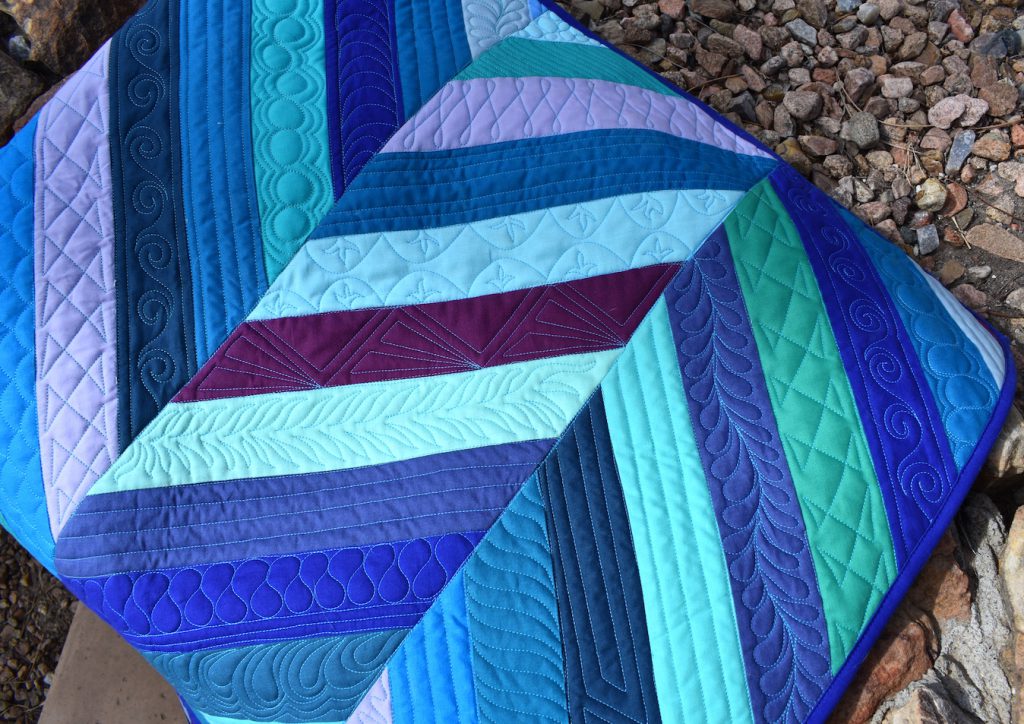
The whole thing was done with hand-guided free motion and 1 straight ruler. I have a lot of other rules but I wanted to work on my free-hand.
I was working on trying new motifs as well as trying to master ones I’ve had trouble with. I generally struggle with ribbon candy and really struggle with the echoed ribbon candy.
I also struggle with serpentine lines, so I did a bunch of those rows too.
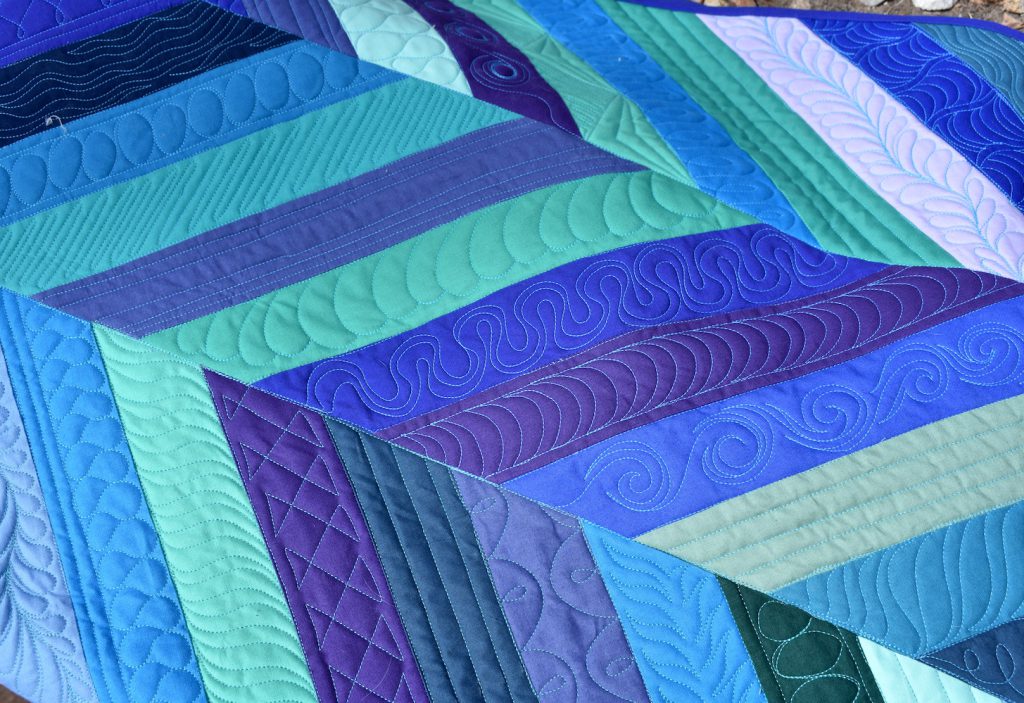
I had fun with the clam shells.
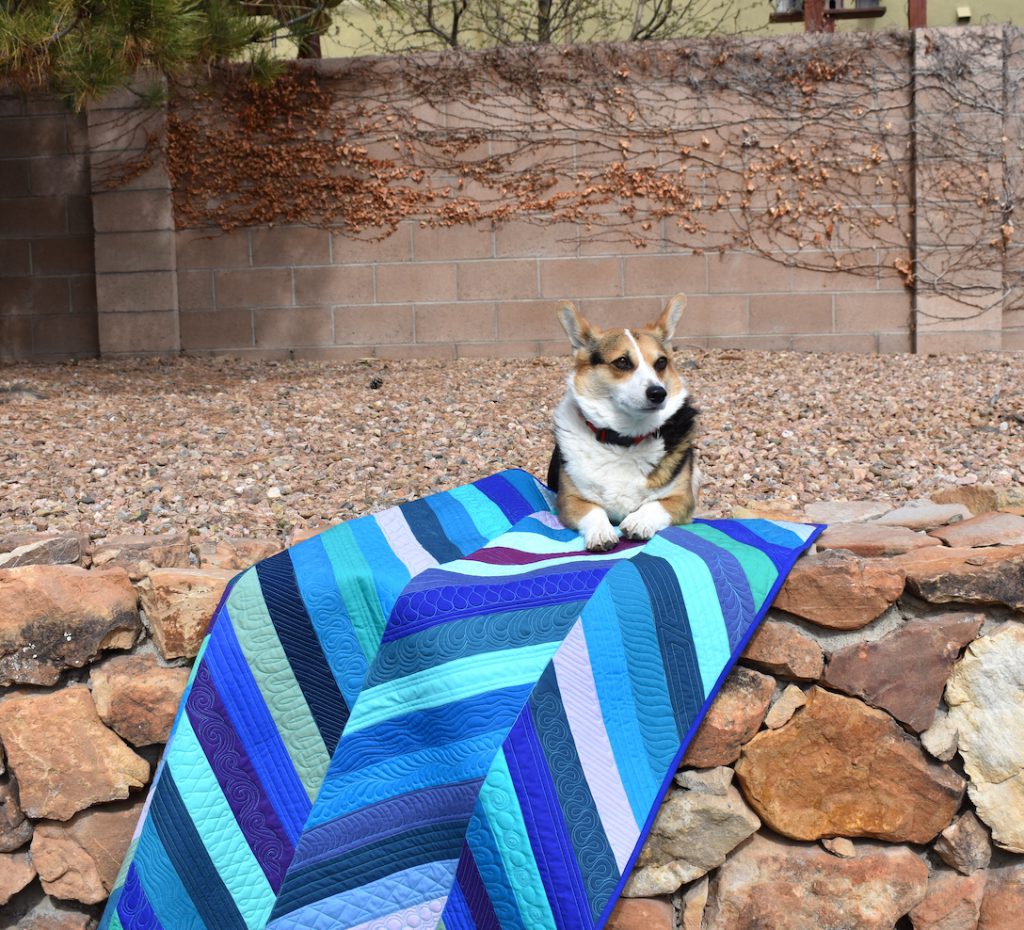
I interrupted Maggie’s yard patrol to force her to pose for me.
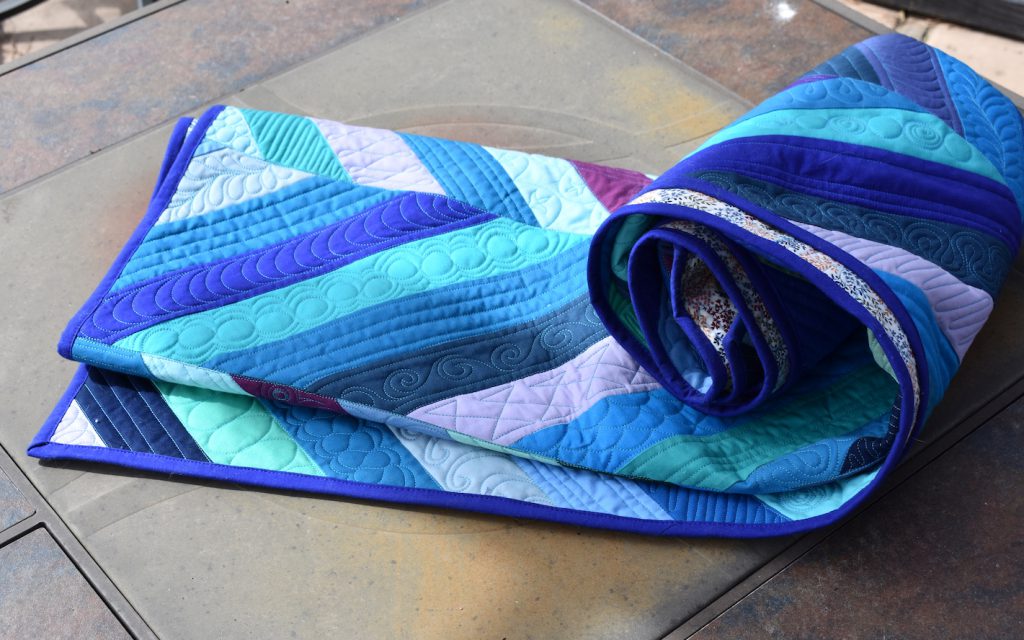
and the binding:
Final Details:
- Finished 49″ wide by 56″ long
- Warm and Natural Batting
- Isacord #4113 (a medium blue) in the top and bottom in the outer two columns on both sides. Glide #32237 (lagoon – a teal) in the top and bottom in the center 2 columns. I used two different threads because I was worried I wouldn’t have enough of one to finish the whole thing.
- 151,032 total quilting stitches and about 7.5 hours of quilting. It was all fun!
My plan is to donate this quilt to my local Project Linus. I did have a friend say that it would make a really good stitch library, and it would! I like that idea.
Link Ups:
- This was a finish on my Q1’19 FAL list so I will be posting it on the FAL linky at the end of the quarter.
- Also linking up to Meadow Mist’s new Favorite Finish Monthly Linkup
Wow, this is beautiful! I love the colors and your quilting is amazing! What a fun way to play with different motifs!
Thanks so much!. It was fun to quilt. I liked the colors of the original one from the show better than mine, but it was good to use up some things from my stash. Thanks so much for commenting and stopping by.
Your quilting is fantastic. Love the patter too. I binge-watch Angela Walters before starting to quilt my tops.
Thanks so much! The pattern was fun to make and such great quilting practice. If I’m not watching her videos I’m using Shape by Shape Vol 1 or 2 for inspiration before starting to quilt
This project checks all the boxes: it used up scraps, helped you work on your FMQ, and will benefit a good cause. Awesome!
Thanks – I agree! That’s why I was so excited to make it when I first saw the pattern. It was a really fun one to make.
Hello! What a great use of all of those leftover jelly roll strips. It looks like the seams don’t need to match up between the columns, which is nice. And what a great pattern to try out different FMQing options on each strip. Really nice finish – I can see why this was your choice for favorite March finish. ~smile~ Roseanne
You are correct – the seams DID NOT have to match up, which was so great. I made the top during my January quilt retreat and one of my friends kept saying “really? the seams don’t have to match up??” That made it an even better pattern to try. Thanks so much for your kind comments!
I love how you did the quilting. Great finish!
Thanks so much! It was so fun to do!
This is so fantastic! I love all of the different quilting designs!
thanks so much! Thanks for stopping by and thanks for starting this link up!
Your friend is right – it’s a great stitch reference quilt! You’ll have to take lots of pictures before you gift it. The solids really make the stitches pop. Did you have a list of stitches you wanted to try out, or were you ‘inspired as you go’?
Believe me, I have a lot of pictures!
I have a notebook that I use to practice designs and record ideas. I used a couple of different sources and drew up about 20 different designs. Some of them I used a few times and some I didn’t use at all. I also modified some as I went along and made them into different designs, and others I just jumped in and attempted (though not many – I’m a bit of a planner). I like having the guide to fall back on when my mind suddenly goes blank!
Absolutely gorgeous and what a great way to practice your designs. I’ll bet you can see your improvement from the first to the last stitch!!
It’s a beautiful quilt and your fmq looks just great. Very inspiring! I enjoy Angela’s videos too – they always make me smile.
The quilting on this quilt is divine. Thank you for all the beautiful close up shots.
Well done on the finish, using leftovers and your beautiful freehand quilting. Thanks for sharing & take care.
I just LOVE the quilting on this one! It must have taken so long but it is worth it! Congratulations on your finish on behalf of the 2019 FAL team.
Would you happen to know if there is a secondary link to the pattern besides the one on Angela Walters you tube . Because blueprint is gone it won’t connect to the craftsy equivalent and I’d really like to make this pattern.
Hi – I poked around a bit and also could not find any other links to the pattern. From what I remember it wasn’t too hard:
join 3 2.5″ strips together, offsetting them slightly for the next 45 deg cut
cut one strip set at a 45 deg angle going top left to bottom right, with 13″ between cuts – so you get 3 13″ sections per strip
cut another strip set at a 45 deg angle going top right to bottom left, with 13″ between cuts – 3 more 13″ sections, but going the other way
cut another strip set with 45 deg triangles (so cut bottom left to upper right, then from that point as your new upper left cut down 45 deg to the lower right – to make a triangle). These are your row caps.
join the 13″ sections together to make columns, with the caps on the end. Then join the columns together with opposite facing strip sets to get the “V” effect.
There are no matching seams at all, so it is really pretty easy to get together.
I hope that helps – good luck!