I have a friend who recently bought a long arm and I find myself providing all sorts of unsolicited advice. I’ve had my long arm for 3 years and I love it. It really has been quite a learning curve, but I have used mine a lot and am really happy I took the plunge.
I apparently have a lot of passion around lessons I’ve learned so I decided to do a post about my thoughts. In Part 1 I’ll cover tools I think you need and good accessories to have. In Part 2 I’ll talk about problems I’ve had along with the solutions I discovered.
In a few places I added links to products I use. To the best of my knowledge these are NOT affiliate links.
Machines
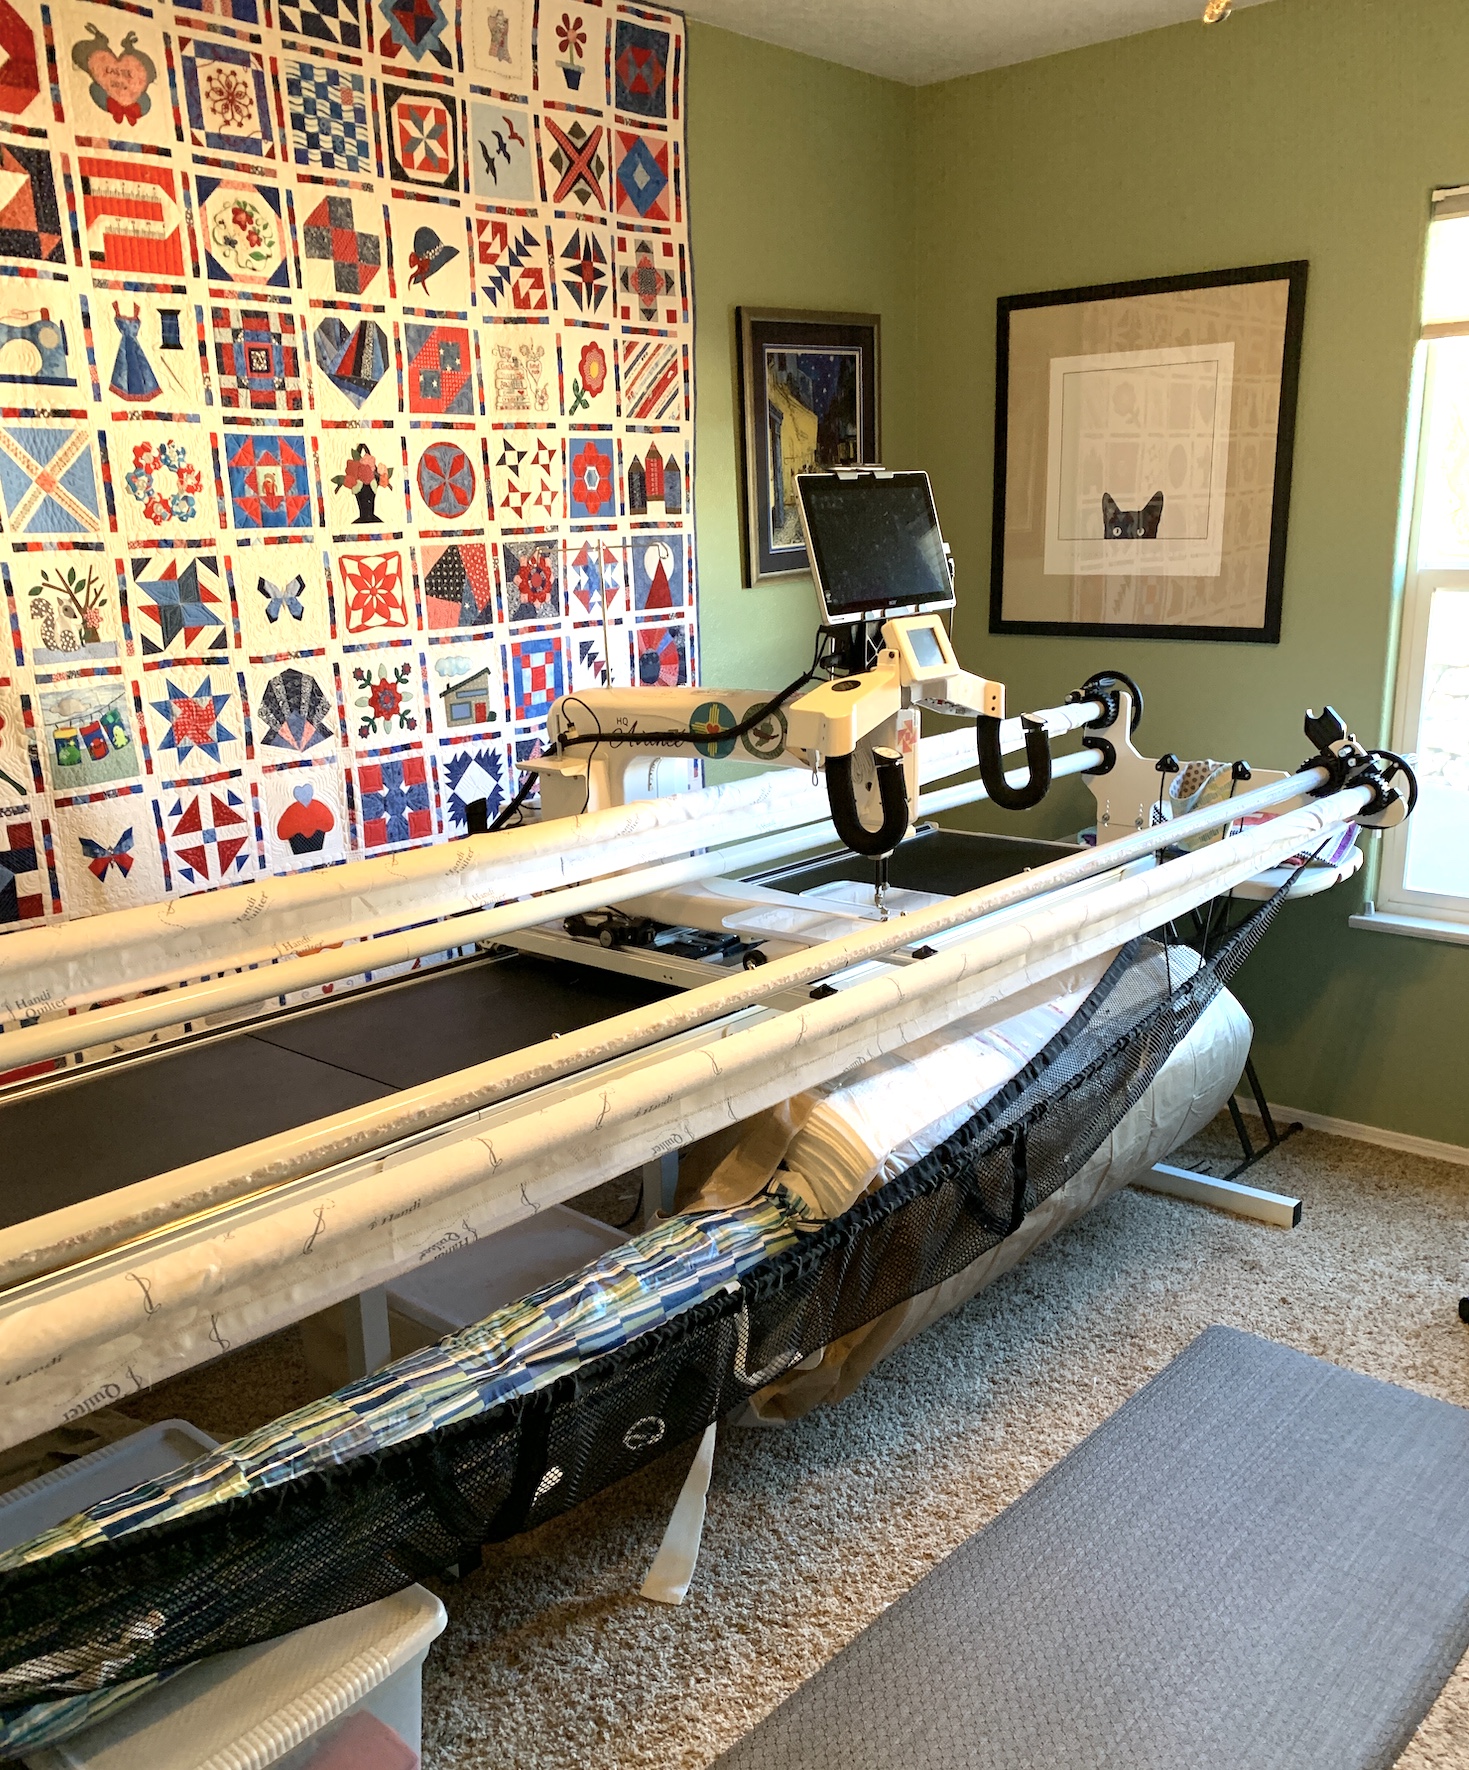
I have a HandiQuilter Avante with a ProStitcher. I bought mine used from my local machine dealer – it was their demo machine. Actually, I took a few days of long arm classes to rent a machine at their shop and I wound up buying the machine used during those classes. My machine is on a 10 foot frame because that is what I could fit into my room. I love my machine and have been very happy with it.
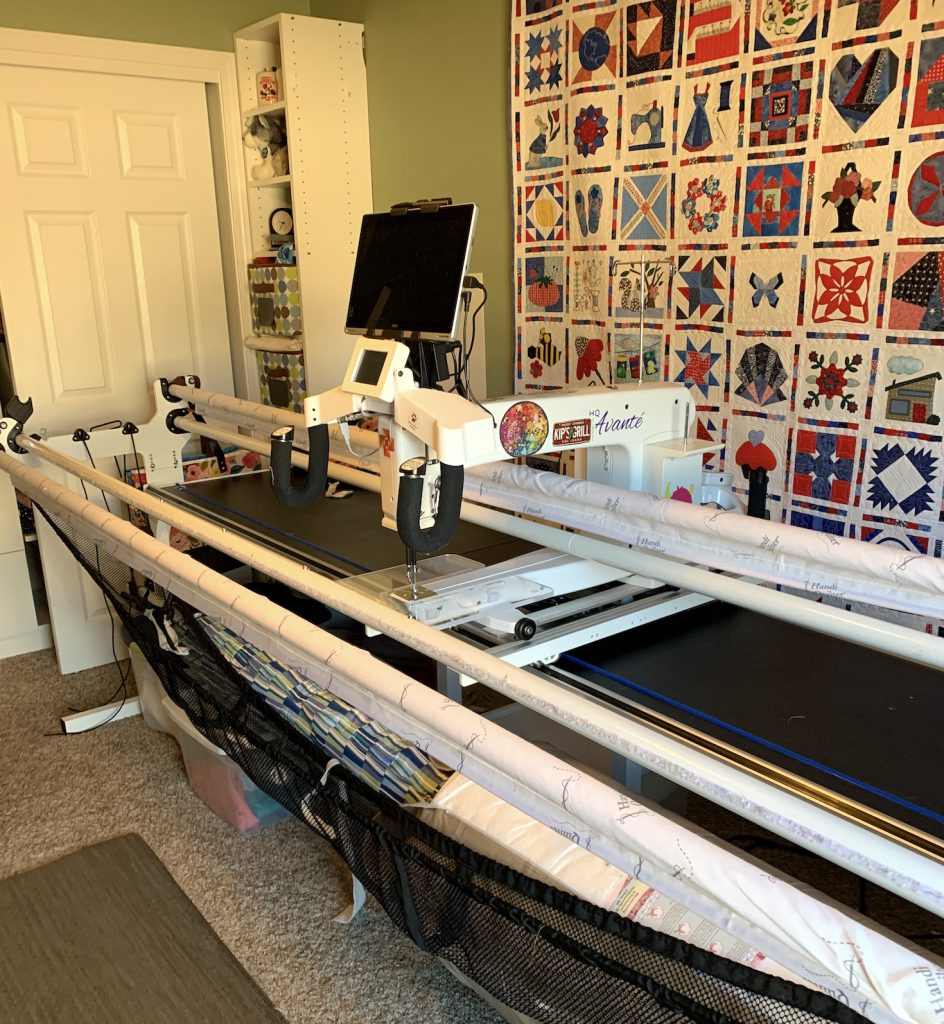
Shortly after I bought my machine HandiQuilter released the Amara. My Avante has a 18″ throat, while the Amara has 20″. The Amara also has some nice features. I was kind of sad when I first saw the Amara and actually did briefly consider trading mine in. However I’m used to the weight and feel of my machine, and to me the Amara now feels heavy in comparison. I’m still really happy with my Avante, and I’m glad I kept it. (but I’m sure the Amara is awesome too!)
Machine Feet
I haven’t bought a lot of feet for my machine. I used the feet that came with it for a long time, even with rulers, and had no problems. I used the ‘C’ shaped one the most often because it was easier to see what I was doing. When I tried a double batting it was really fluffy so I bought a ruler foot. I love this foot, and now this is the one I use for all free motion and ruler work.
The ruler foot is on the left and the original two feetare on the right.
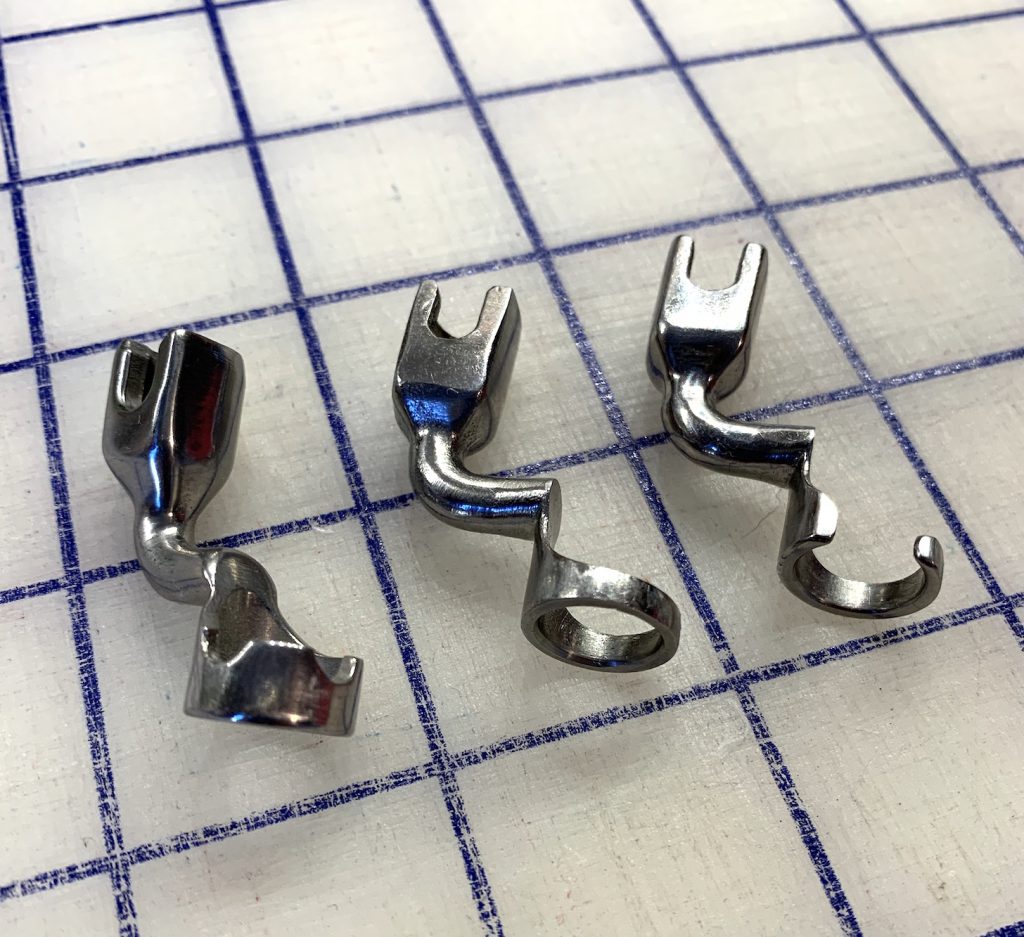
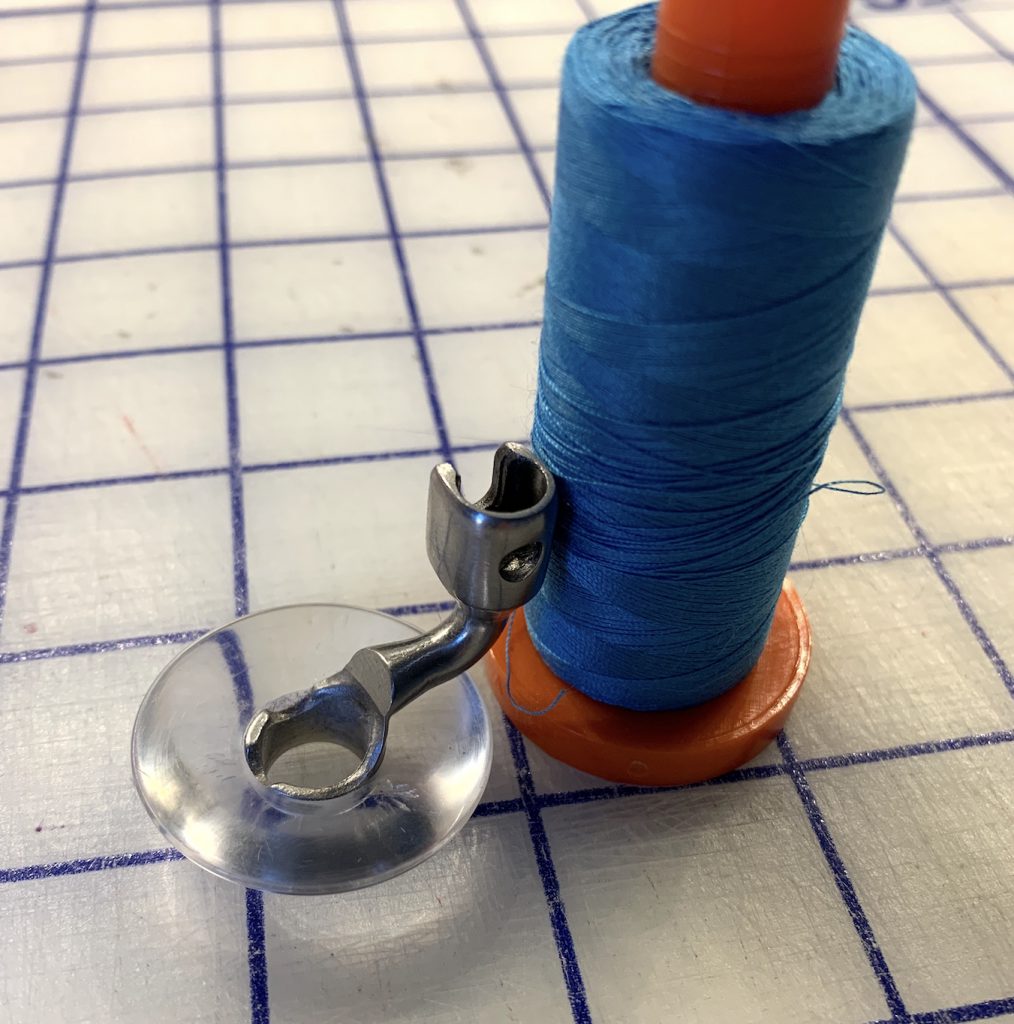
Because I had a ProStitcher, I bought a HandiQuilter Glide Foot fairly early on. I did make the mistake of having a regular foot catch on the edge on a quilt – I was really lucky the quilt didn’t tear. The Glide Foot, or some sort of spoon/bowl foot, helps avoid that. However, I think I only quilted about 3 quilts with my ProStitcher before the Glide foot broke. It is all plastic and it broke off at the screw – maybe from the vibration? The Glide foot runs about $50 so I was very disappointed it lasted for so short of a time. The foot on the left below is the one that broke. We tried to superglue it back together but I never actually tried it once glued.
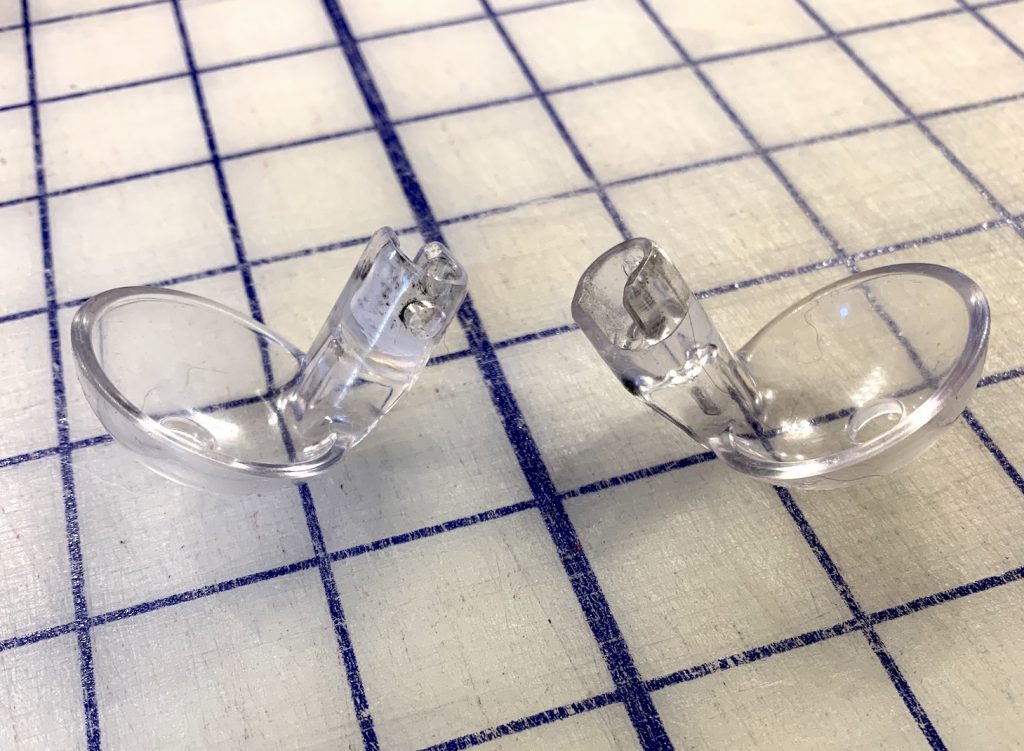
I saw an add online for a different foot, from people that seemed to have had the same problem that I had. This is the link to the foot at Quilt Frog – I bought it, and I love it. It has a metal shank that won’t break and still glides over the quilt top nicely. The thread in the photo is only there to hold up the foot. I’ve used this for a lot of quilts.
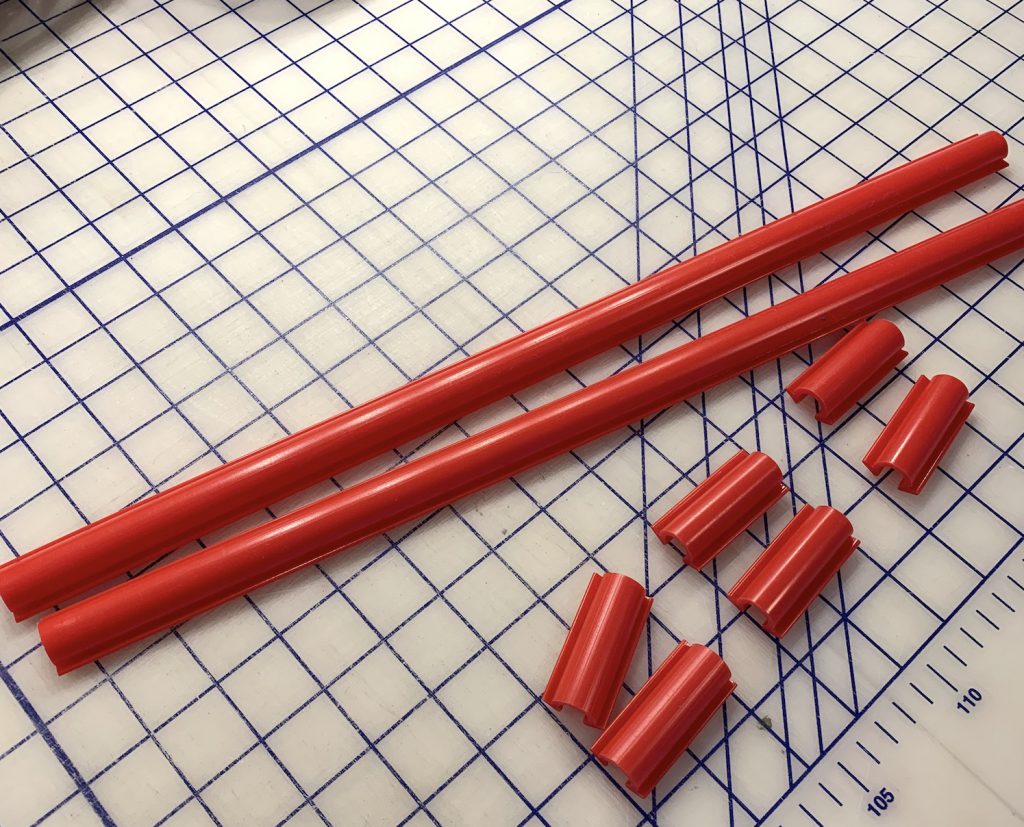
Rulers
I have purchased a lot of rulers. I really didn’t need this many rulers!
However, after all of those purchases these are my favorites:
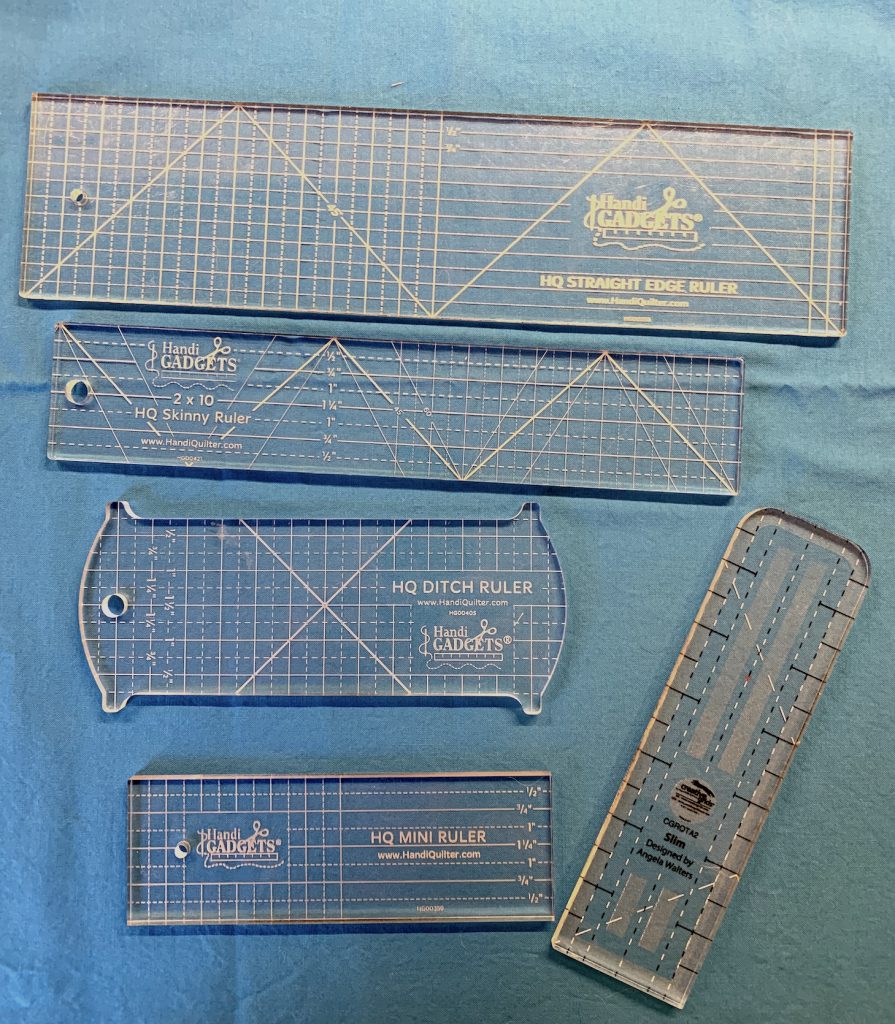
A small straight ruler: I have a few of these, and they are the most useful. When I started I bought a the larger, longer ruler at the top of the photo but found it really kind of hard to work with. I use the bottom two rulers in the photo the most – probably use for 90% of the ruler work I do. One is a HandiQuilter and the other is Angela Walters’ Slim ruler. I also really like the thin, but longer HandiQuilter ruler that is second from the top.
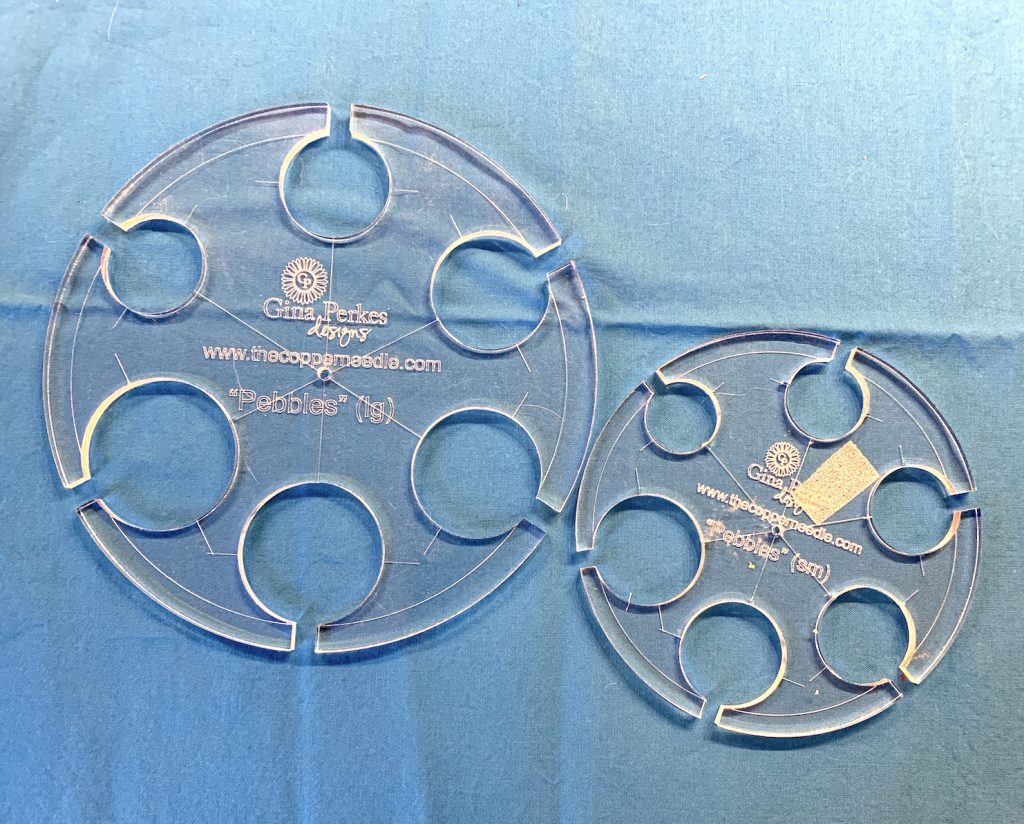
Circles and Pebbles: I have a hard time free-handing circles and pebbles. I bought these to help me out. These are from Gina Perkes at The Copper Needle.
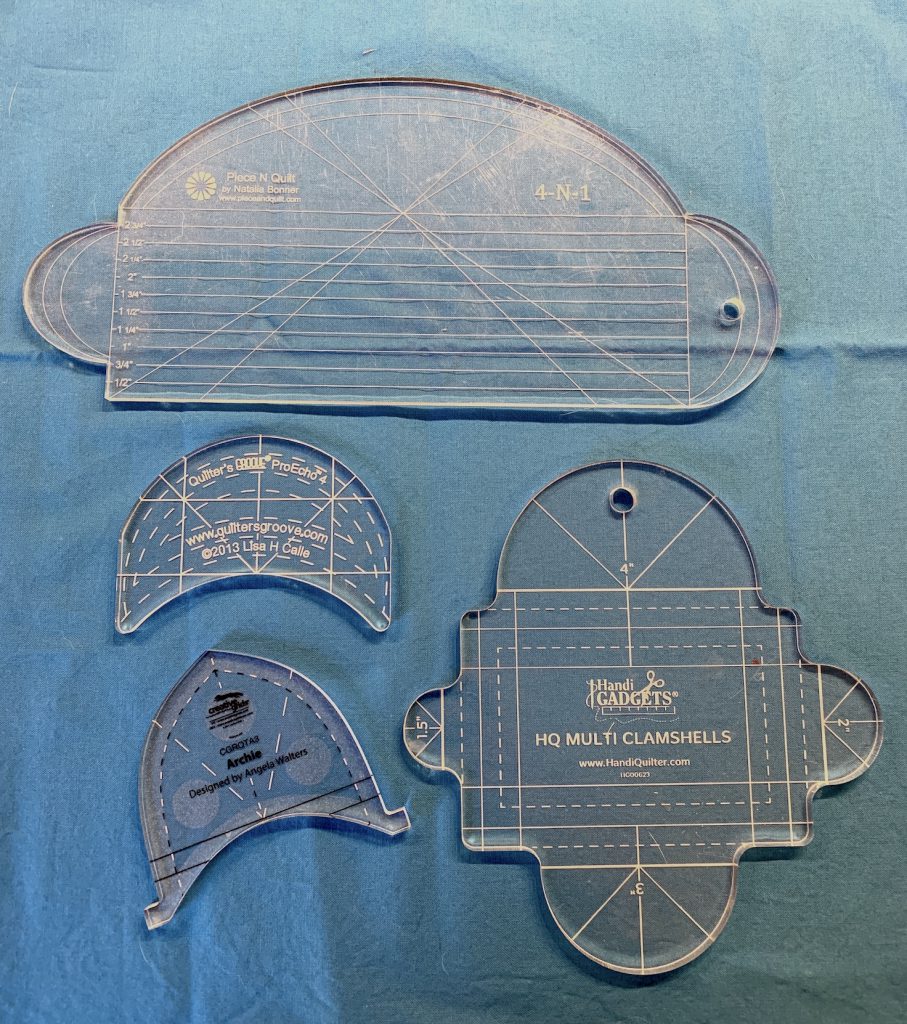
Curves: I am not very good free-handing continuous curves either, so I bought a few ruler sets to help me out. The top one is the 4-N-1 ruler from Natalia Bonner at Piece N Quilt. Next down on the left is a ProEcho curved ruler from Lisa Calle at Quilters Groove. Next down on the right is the HandiQuilter ClamShell quilt. On the bottom on the left is Archie from Angela Walters.
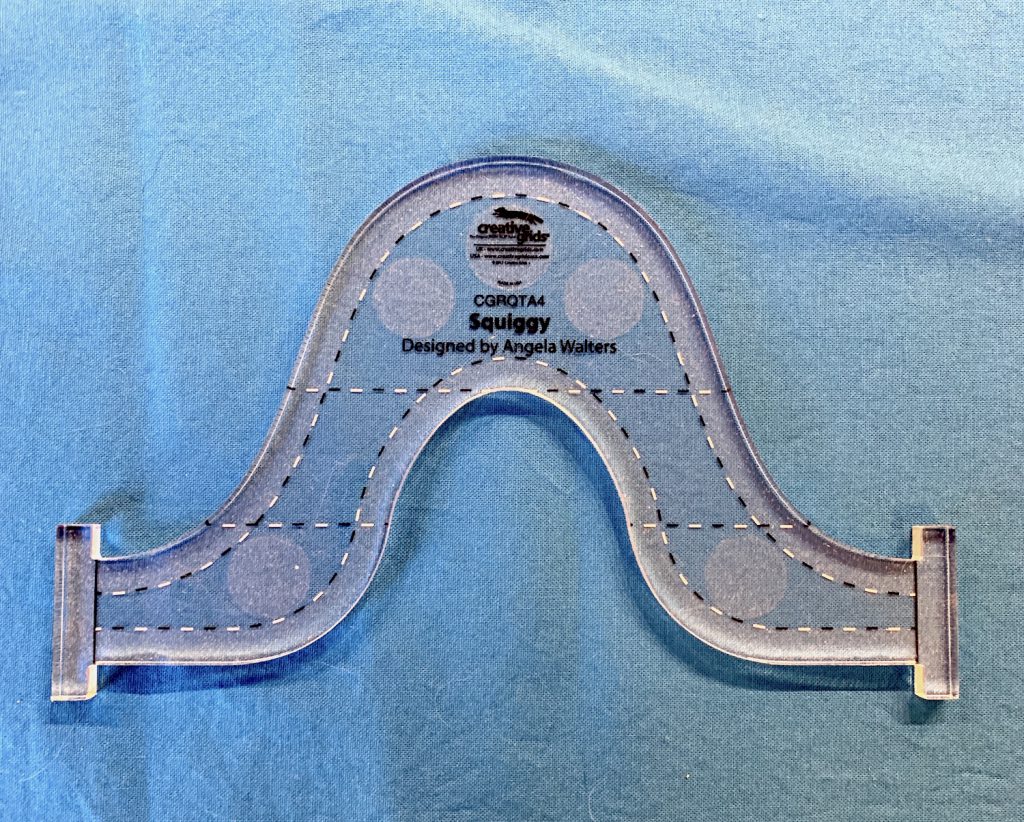
Serpentines: I have also not been very good with serpentines, so I have really enjoyed having Angela Walters’ Squiggy ruler
Thread
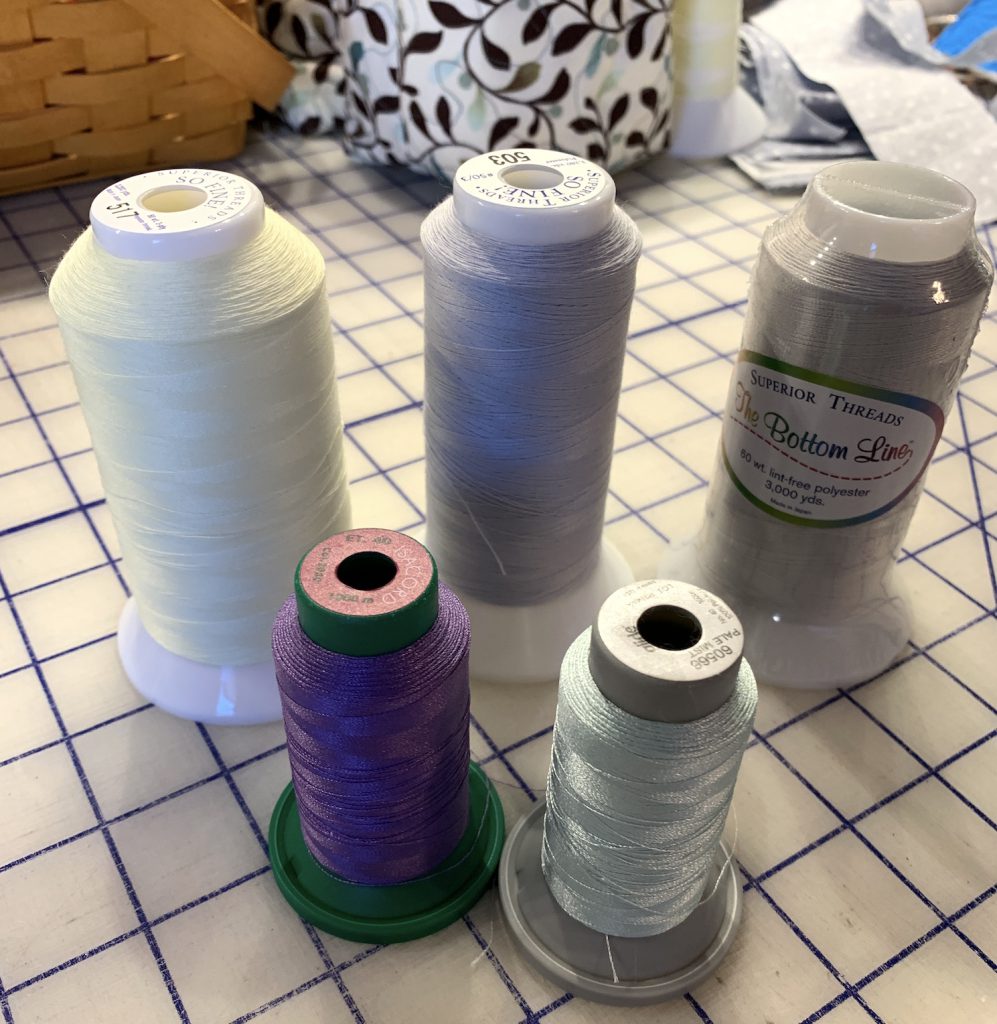
My local sewing machine shop is very enamored with Isacord thread, which is similar to Glide. These are both 40 weight threads, and I like to use them when I want a thicker thread effect. Most of the time I use So Fine #50 in both the top and bobbin. Occasionally I use Bottom Line in the bobbin.
I use a lot of SoFine #50 color 503, a light grey and color #517, a light yellow. The light yellow blends with pretty much all colors and looks good on white too.
Needles
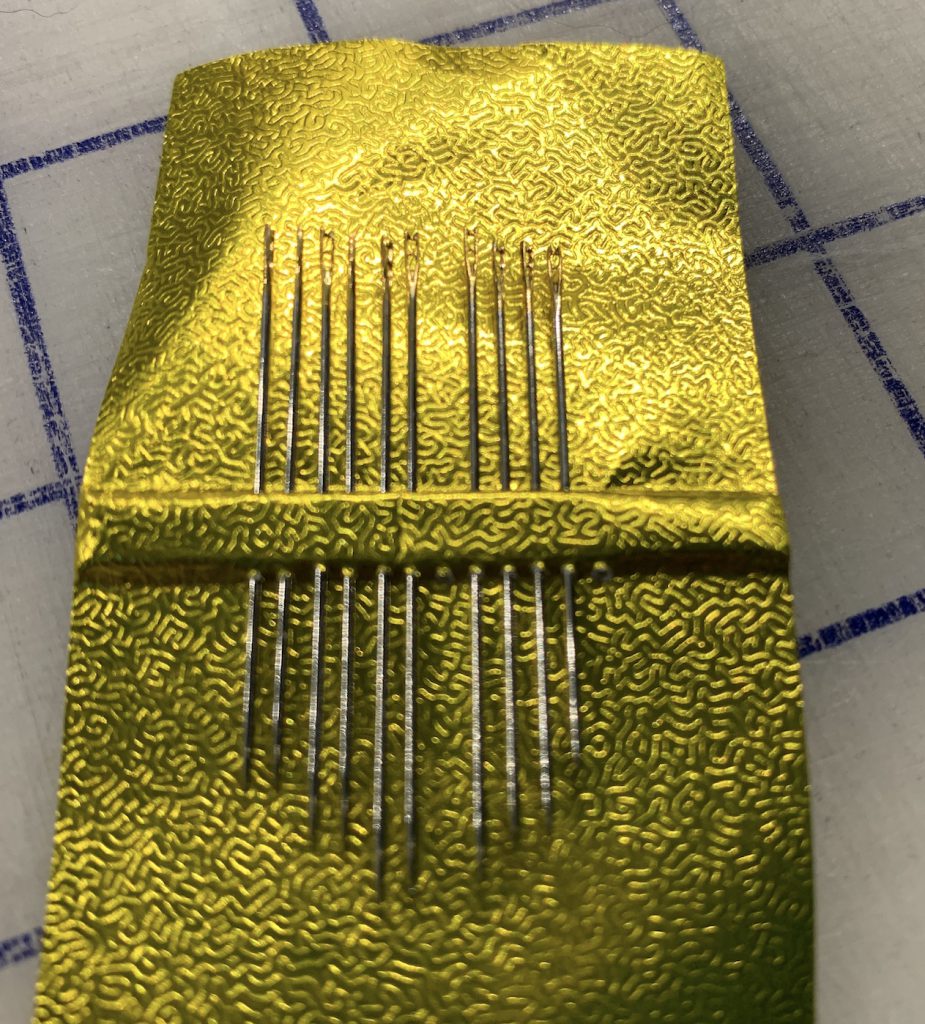
I use primarily Groz-Beckert needles, regular round size #16 needles. I know some people really like ball-point needles, but I’ve never tried them. I also know it is appropriate to change needle size based on thread, but I mainly use pretty normal threads so I’ve always used the #16s. I change needles before every new project.

Have you ever heard of self threading needles? These are the best things for the worst job – tying off threads. I don’t love tying off and burying threads, but I do it if I’ve working on a quilt I want to show or if I run out of bobbin thread in the middle of the quilt. These needles thread through an open slot in the back of the eye, so you snap in the thread to the eye without having to really thread it.
Batting
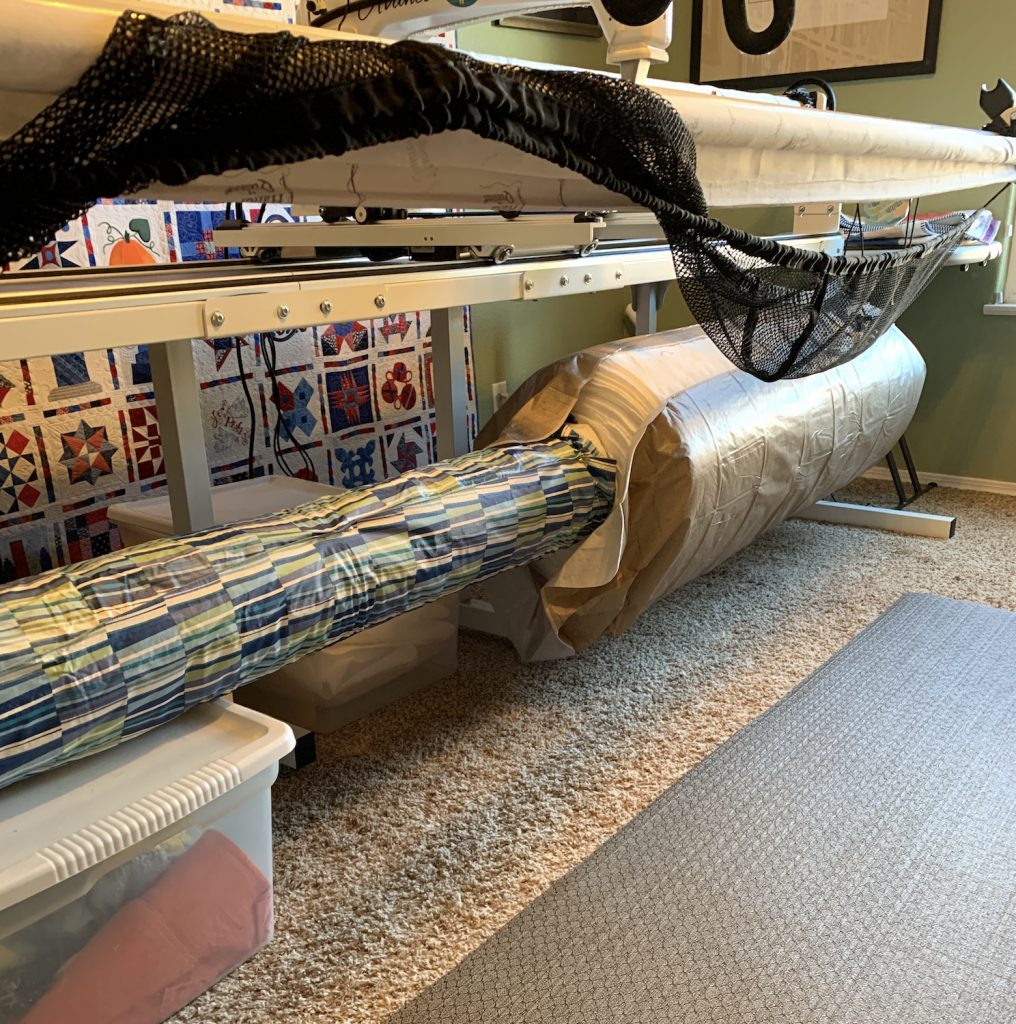
I mainly use Warm and Natural Batting, mainly because it is the one that I have been able to find most easily (and economically) on a roll. I used to buy it from Joann’s with a coupon, but now Amazon has it for an even better price. In December 2019 you can by a 90″wide roll of 40 yards for under $200 – free shipping with AmazonPrime. I store my batting under my long arm. Note the lovely solution of wrapping my batting with a vinyl tablecloth – I had to do this to stop my cat from sharpening her claws on my batting roll!
I’ve also started the habit of buying a package of batting to get to the free shipping amount at websites. If I’m ordering something and I’m below the total needed for free shipping, I’ll either order yardage of Kona Snow or a package of batting. I’ve tried the Fat Quarter shop battings and I like their 80/20 Silky Blend and the 50/50 Bamboo Blend. I’ve also tried several of the Quilters Dream battings. I’d like to buy a roll of a poly/cotton blend or bamboo blend, so I’ll probably try to do that next year.
Notions
One really hard thing about the long arm is that there are SO MANY accessories you can buy. Some are really necessary and worth it, and some are not. These are my thoughts.
Pins or Red Snappers for loading
You need some method of loading the backing on the frame. I bought the HandiQuilter pins (and a cute magnetic bowl! Red with white polka dots!!) and used those for 2 years to load quilts. They are fine, but not the quickest and stabbing yourself with the pins is not fun.

I was really interested red snappers and finally took the plunge and bought them. I love them. I wish I had bought them from day one. Some people have reported problems with the hand strength needed to clamp them down, but I haven’t had that issue. I also know some people use, and really like zippers, but I don’t like the idea of having to sew them on to the backing. I’m worried I wouldn’t get it straight and I’m not sure how that makes the loading process faster. I can see it if you want to take projects on and off the frame, but I don’t do that. I love my snappers.
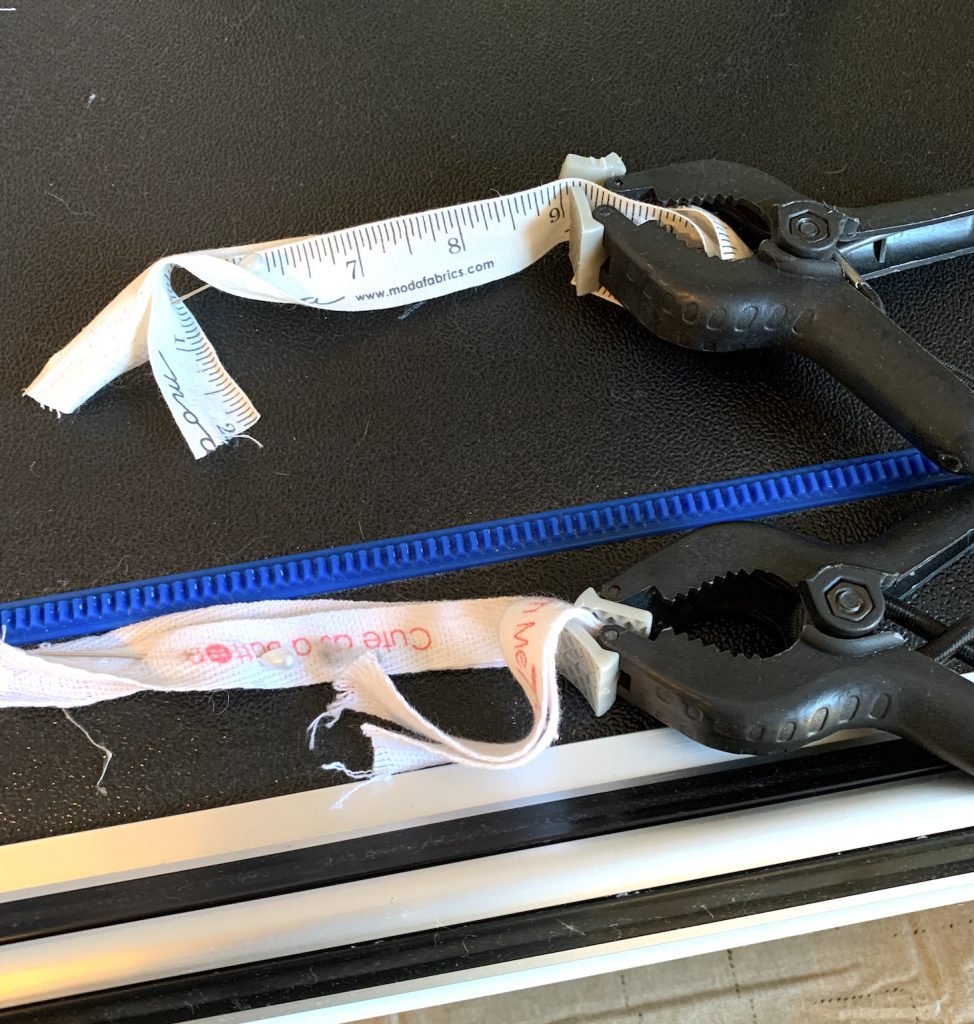
This is the rod casing sewn into my leader and the rod sticking out the end: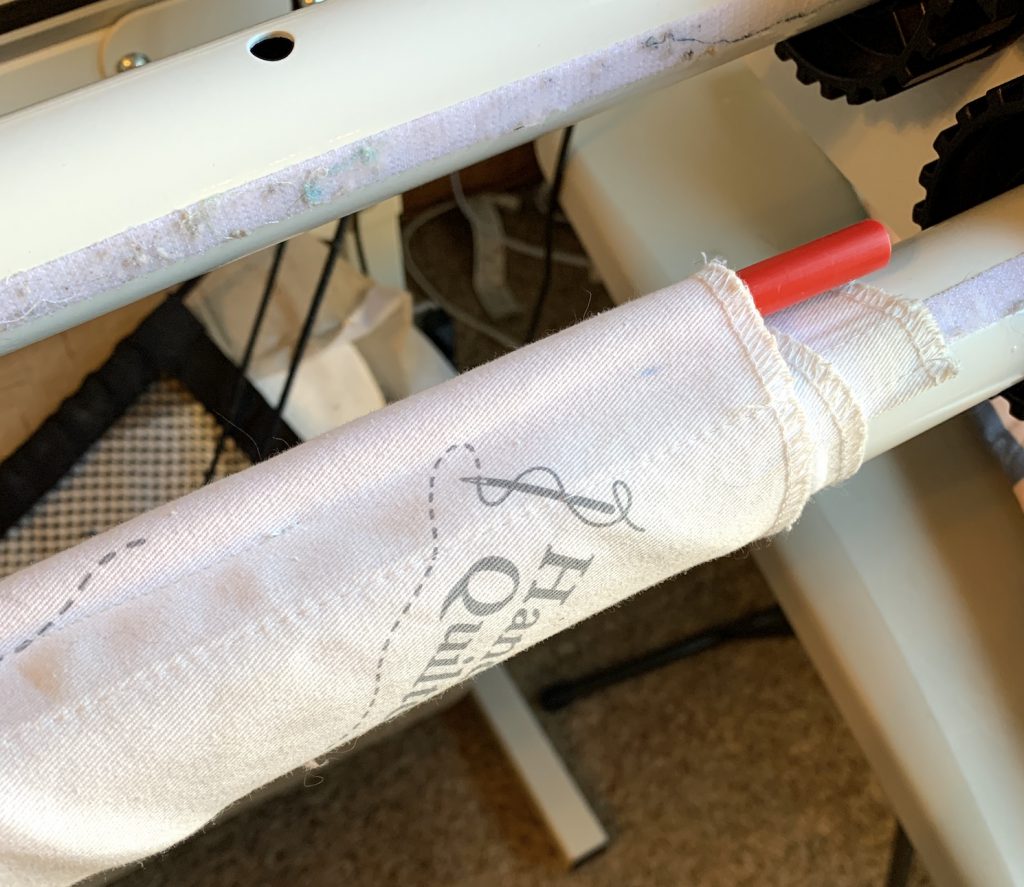
Keeping a record
I’m an engineer, actually a process/production engineer for most of my career, and I have a lot of training in Lean Manufacturing techniques. As such, I’m a big fan of keeping a record of my work. This is my form – I record what thread I use, tension settings, Prostitcher design details, number of stitches or rows in a bobbin, amount of time spent, and a list of problems and solutions.
![]()
This is filled out form after finishing a quilt:
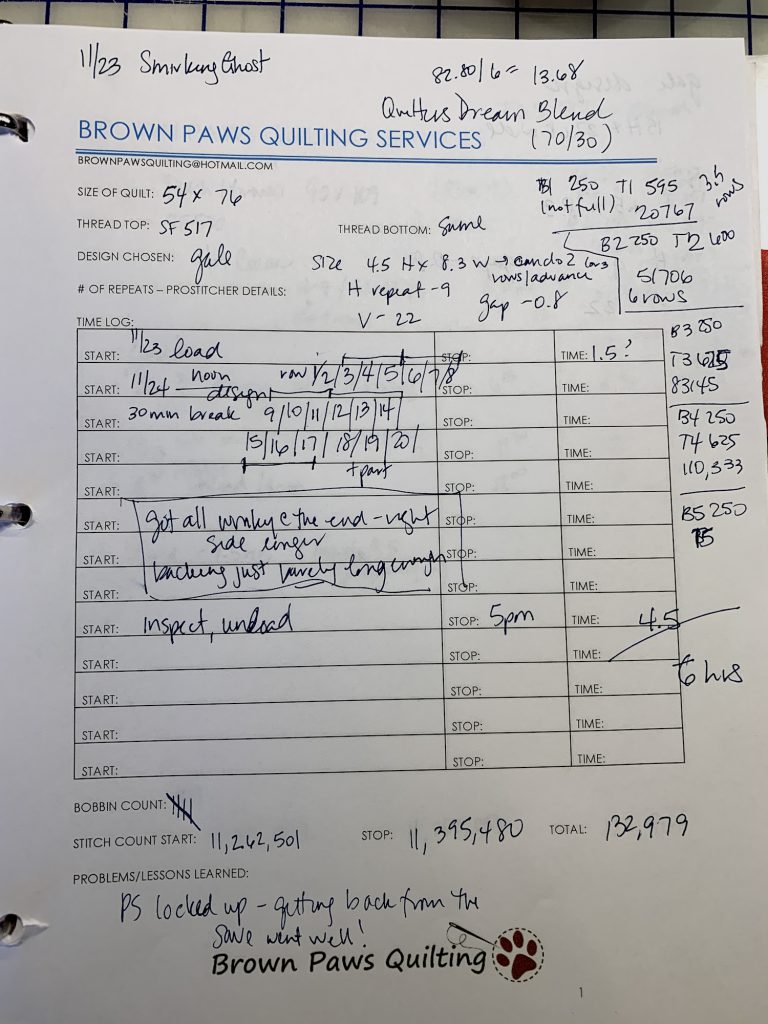
It is kind of a pain to write all this stuff down, but the information is really helpful. I can look back and see tension settings for thread I’ve used previously, when I’ve used flannel or minky for a backing, how many stitches a bobbin of a particular thread will give me, or how to replicate a ProStitcher design I liked on a previous quilt.
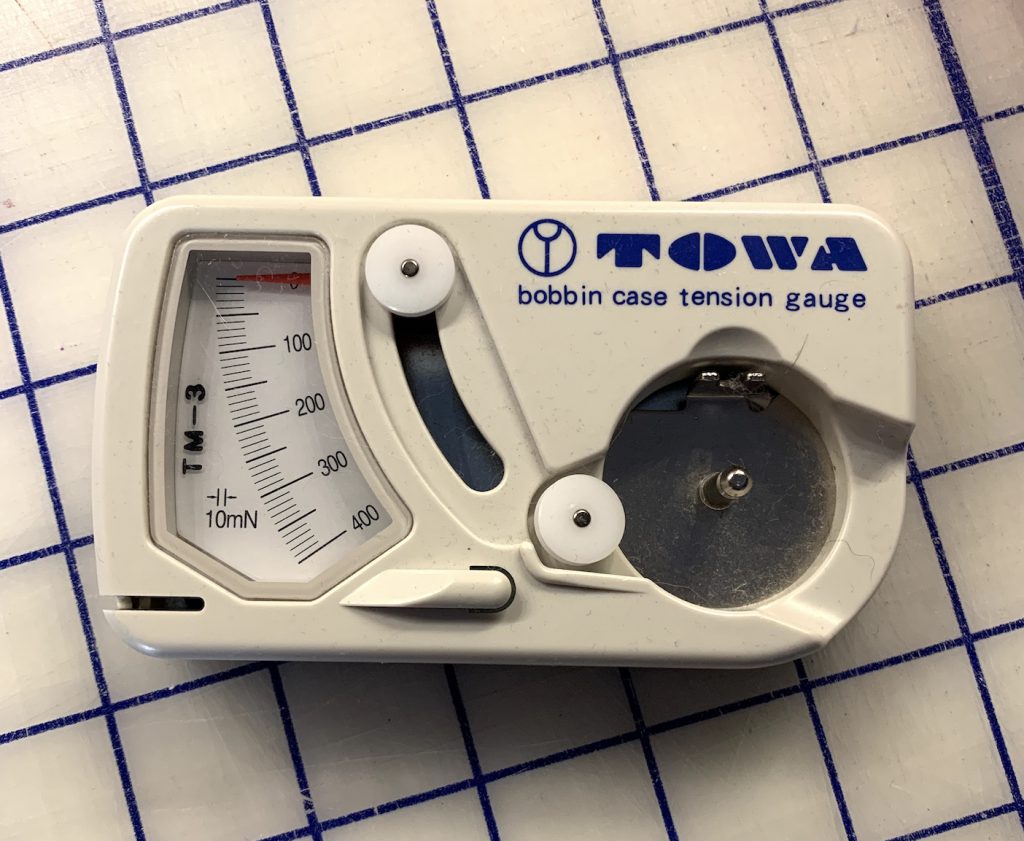
TOWA gauge
My machine shows me a number for my upper tension setting, and the TOWA gauge allows you to get a number for a bobbin setting. I do the “drop test”, recommended by HandiQuilter for setting bobbin tension, but at first it was really helpful to have a way of measuring my bobbin tension so I had confidence in the setting. This gauge, in conjunction with keeping records, really helped with getting my tension consistent.
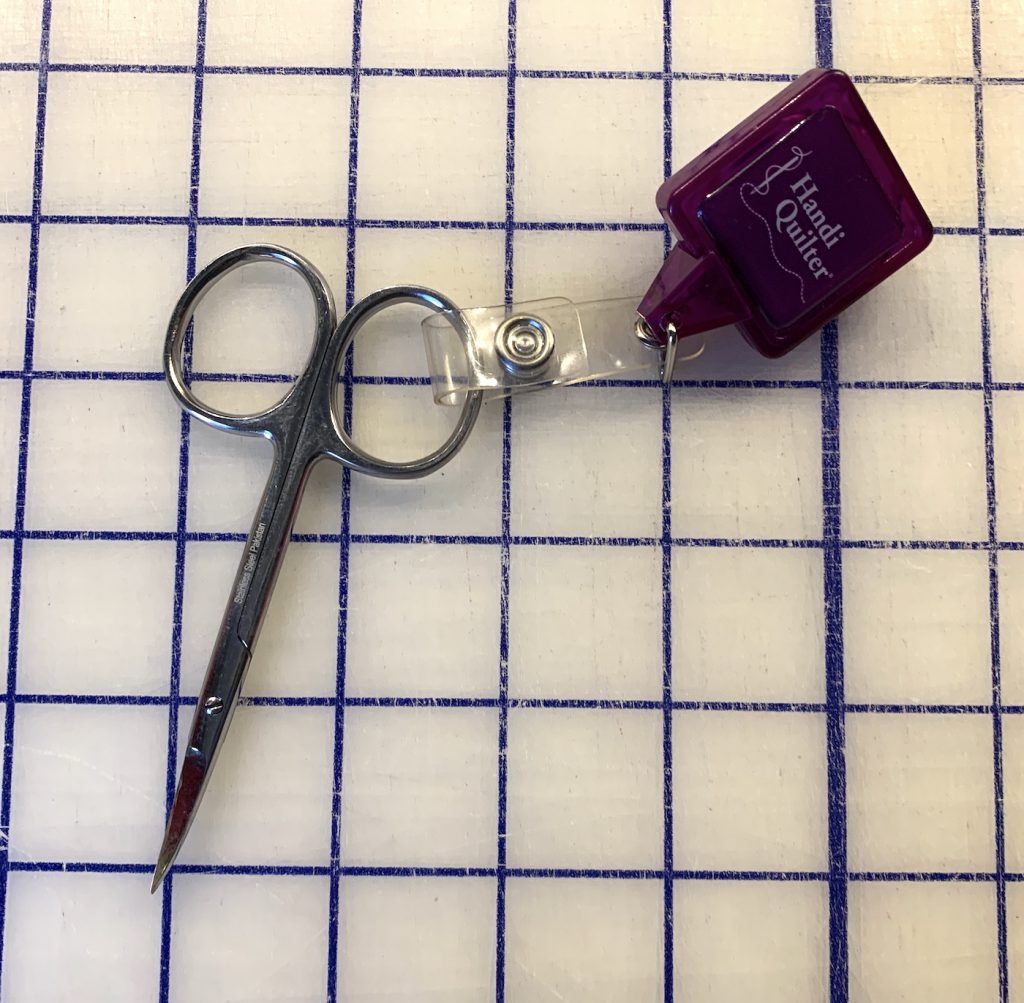
Snips
I got these snips from a class I took from Angela Walters that had a bunch of HandiQuilter machines. I love the little snips and the clipping thing – I attach it to my collar when I work so my scissors are handy.
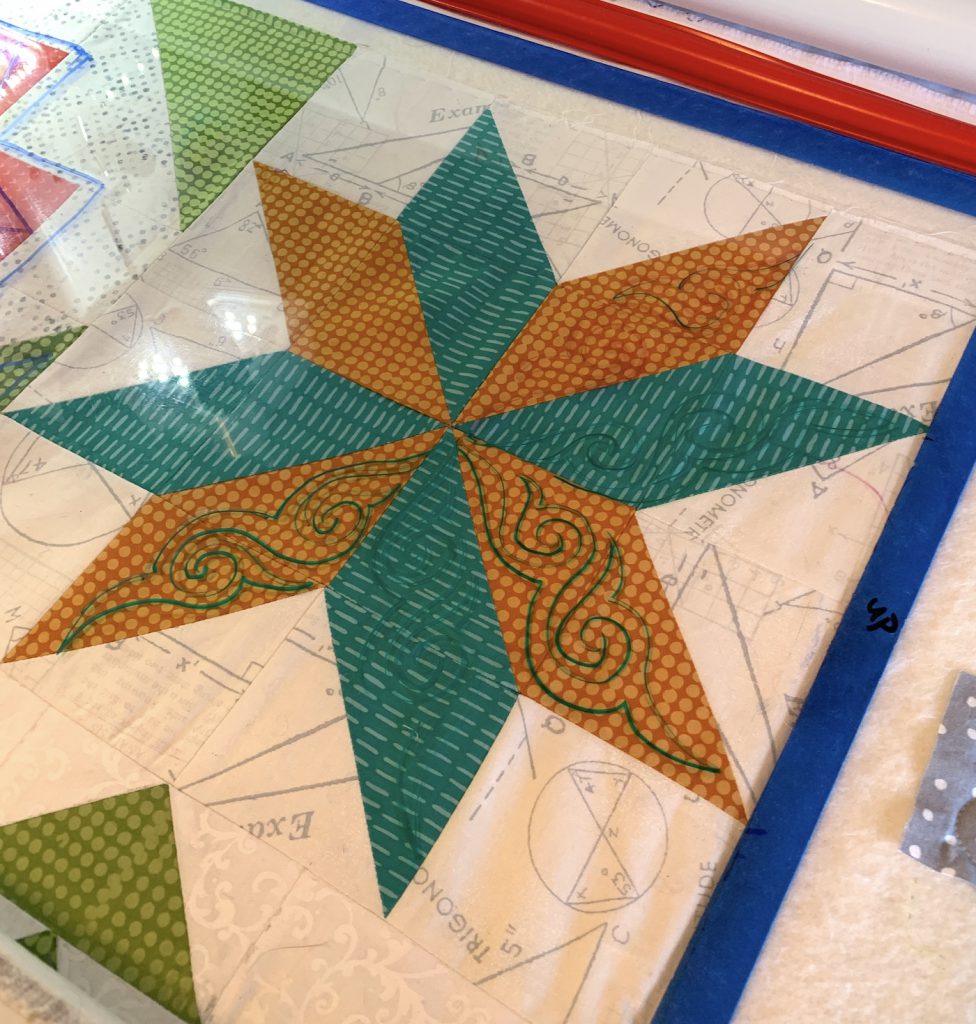
Plexiglass sheet
This sheet is great for laying over your loaded quilt and testing out, or practicing, free motion designs. You can draw on it with a dry-erase pen and then wipe it all off. I bought the thinnest sheet at Lowe’s I could find – maybe 1/8″? It is 18″ by 24″ so it fits between the rails over a loaded quilt. I also added blue painters tape around the edges so I know where the edge is and don’t accidentally draw with a marker off the side of the glass on to the quilt. I labeled the tape with the “Up” side so I don’t get residual marker facing down on my quilt.
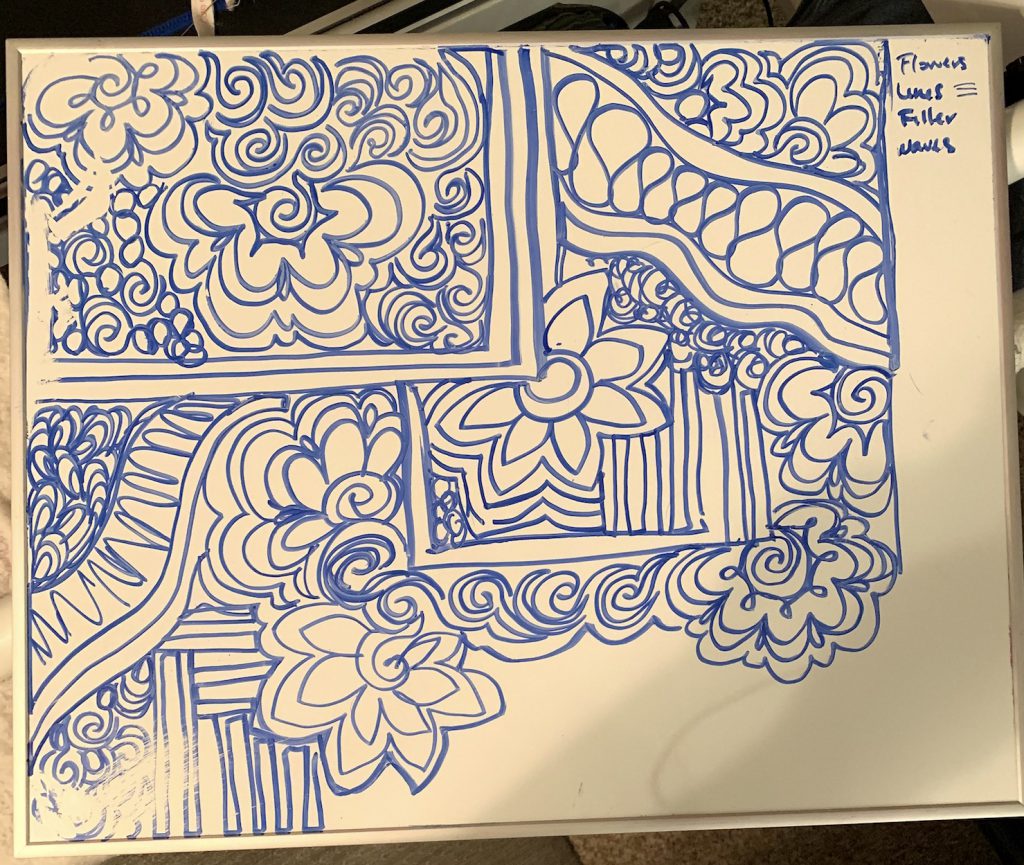
Whiteboard for Practice
In addition to the plexiglass the whiteboard is very useful for practicing free motion. Really, the only way to improve your free motion quilting is to practice practice practice. Notebooks are great for this, as is the whiteboard.
Thread catcher
I’ve read some people just throw their thread tails on the floor – I couldn’t stand that! I have a thread catcher that hangs over the front rail, which also has a pin cushion which holds a few pins and self threading needles.
![]()
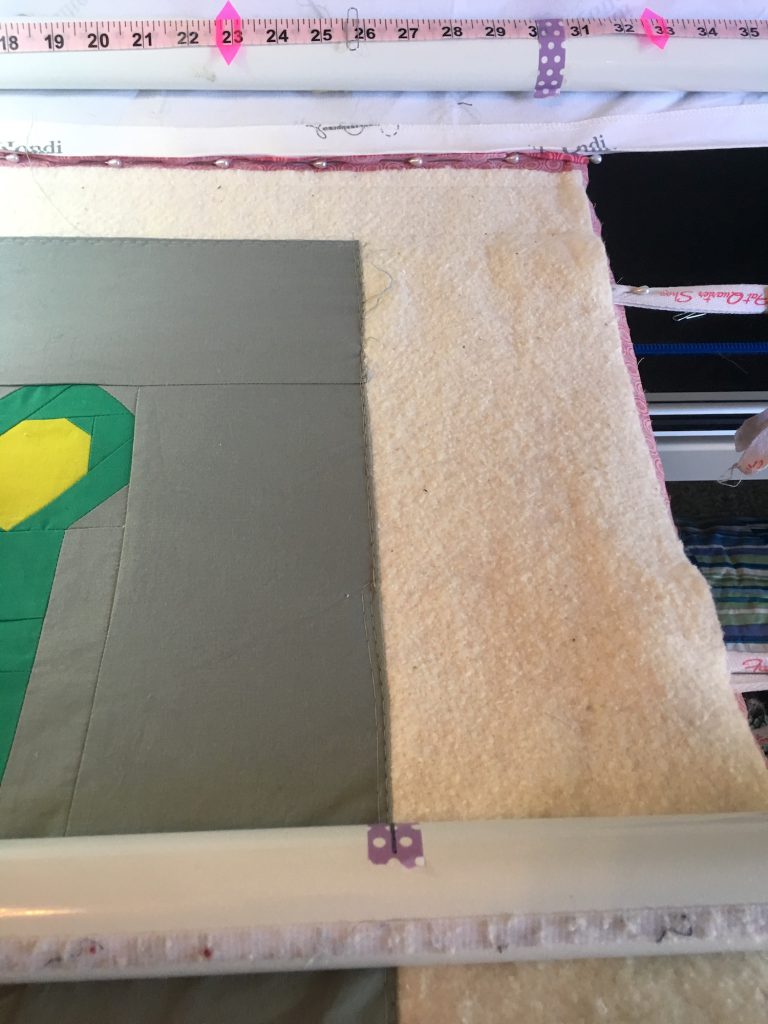
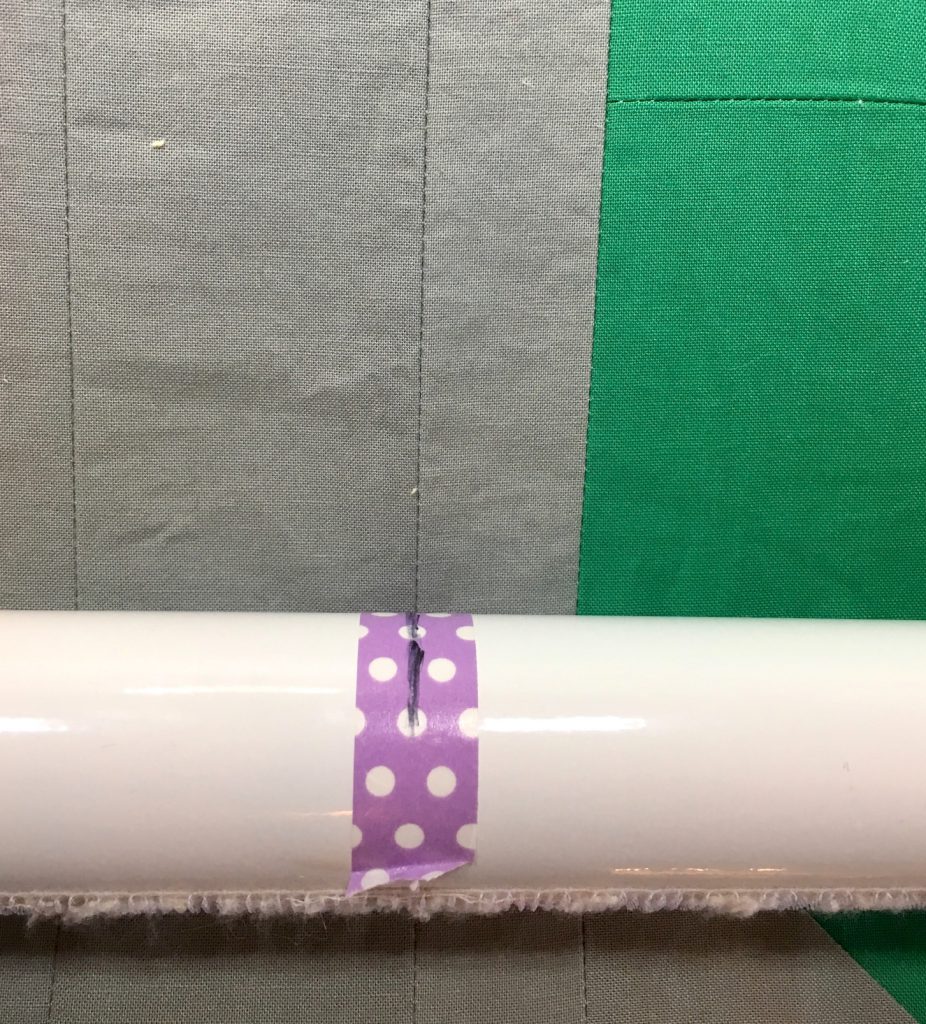
Washi tape for keeping things straight
I tried a long arm tape to run across the frame or my quilt to keep the quilt straight. I didn’t love that as I couldn’t find a good way to mount it and it was too far away from the quilt to line up edges and seams to marks on the tape. I’ve found just using Washi tape works well. I load the quilt, then put Washi tape with a Sharpie line mark in useful places (the edges of the quilt, seams that run vertically down the quilt) on the front rail. This lets me set up the quilt when I load it and keep it straight as I go.
This is the edge of the quilt:
This is a seam away from the edge:
Extra bobbins and bobbin case
Seems like you can never have enough bobbins…and then you need a case to hold them!
![]()
Twill tape for clamps
Your machine can bump in to the the clamps on the side of your frame which hold the backing if the backing is not a lot wider than the quilt top. To avoid this, I pin twill tape to the backing and clamp the clamps to the tape. Fat quarter bundles often come wrapped up with a ribbon or twill tape – I keep that and use it for this purpose.
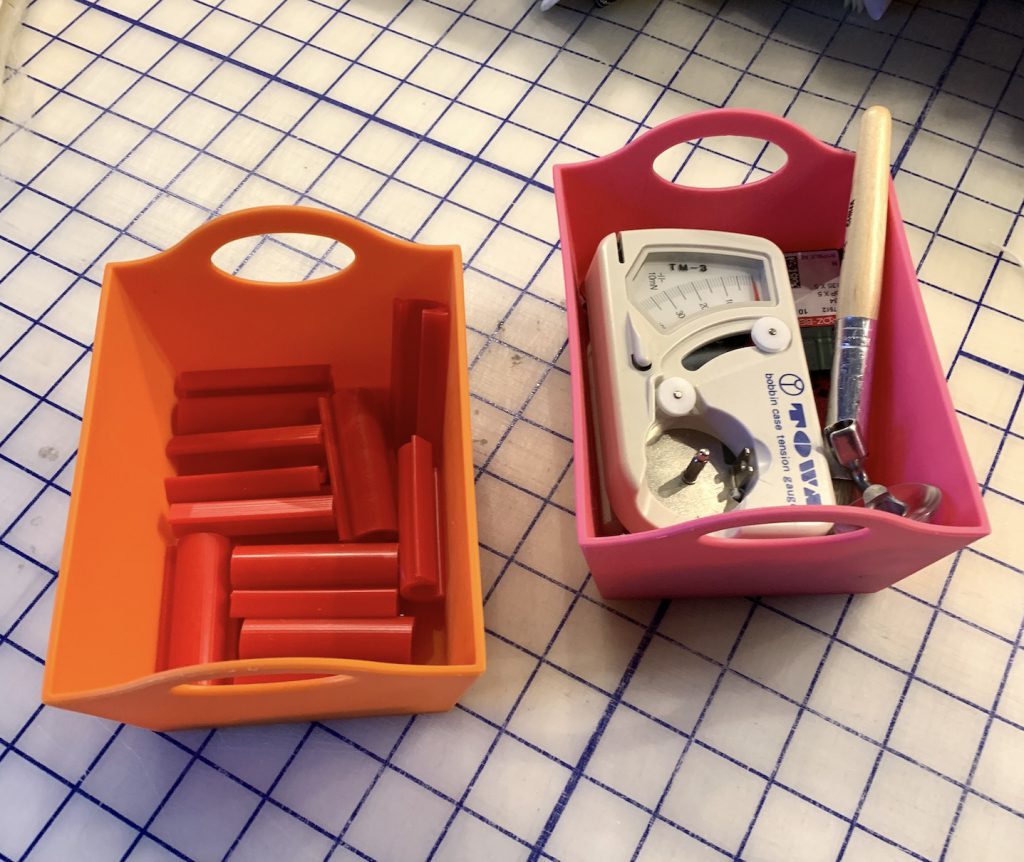
Storage for all of your tools
I keep little kits of tools I need handy. One basket is for foot, needle, and bobbin changes – so my feet, needles, allen wrenches, little screw drivers, lint cleaning brushes, and my TOWA gauge. Another basket has my small red snapper clamps that are used for starting the loading process. Having these handy saves time and makes these jobs easier. I think I got a 4-pack of these baskets from HomeGoods.
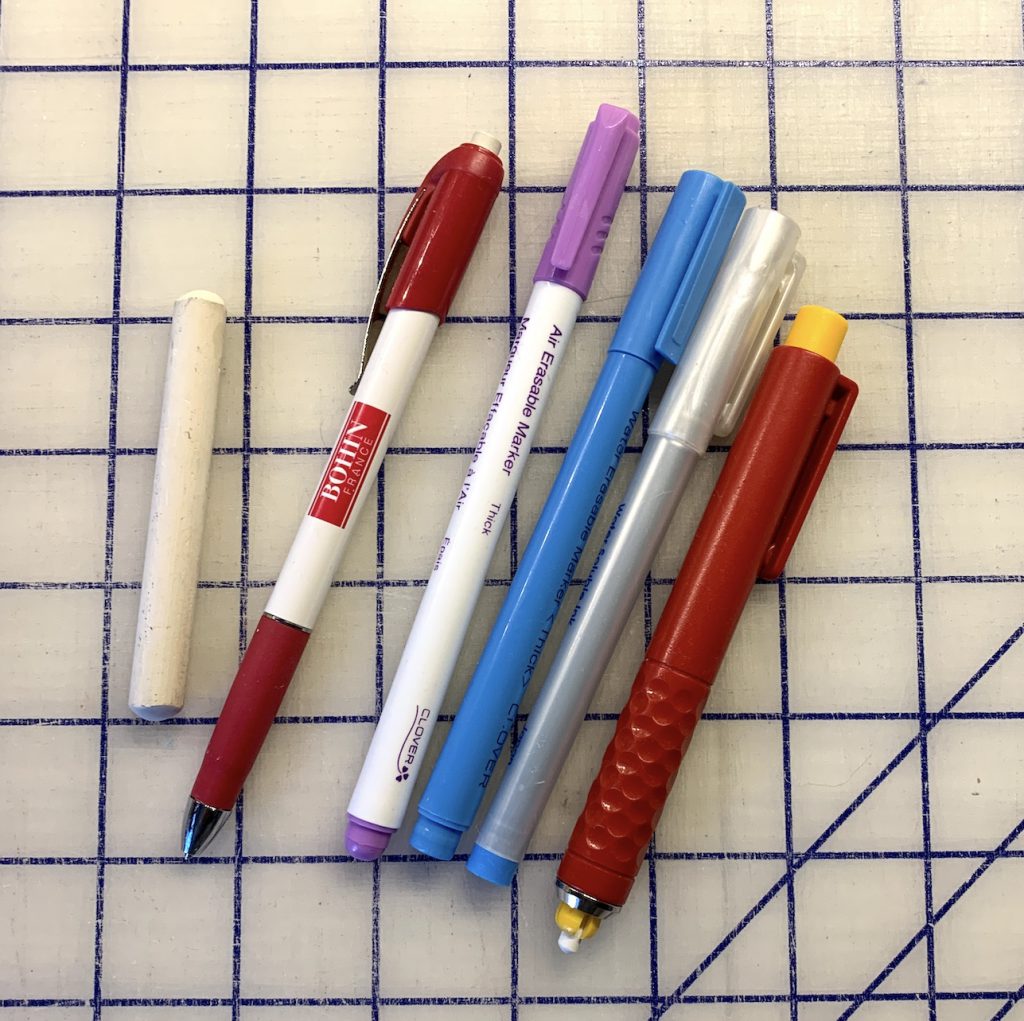
Marking Tools
I see a lot of debate about marking tools. I like both the blue water soluble and purple air soluble markers and have never had any issues with the marks disappearing. I also have some chalk markers, but I like the precision and visibility the markers offer and I tend to have a harder time getting the chalk to go away than the marker.
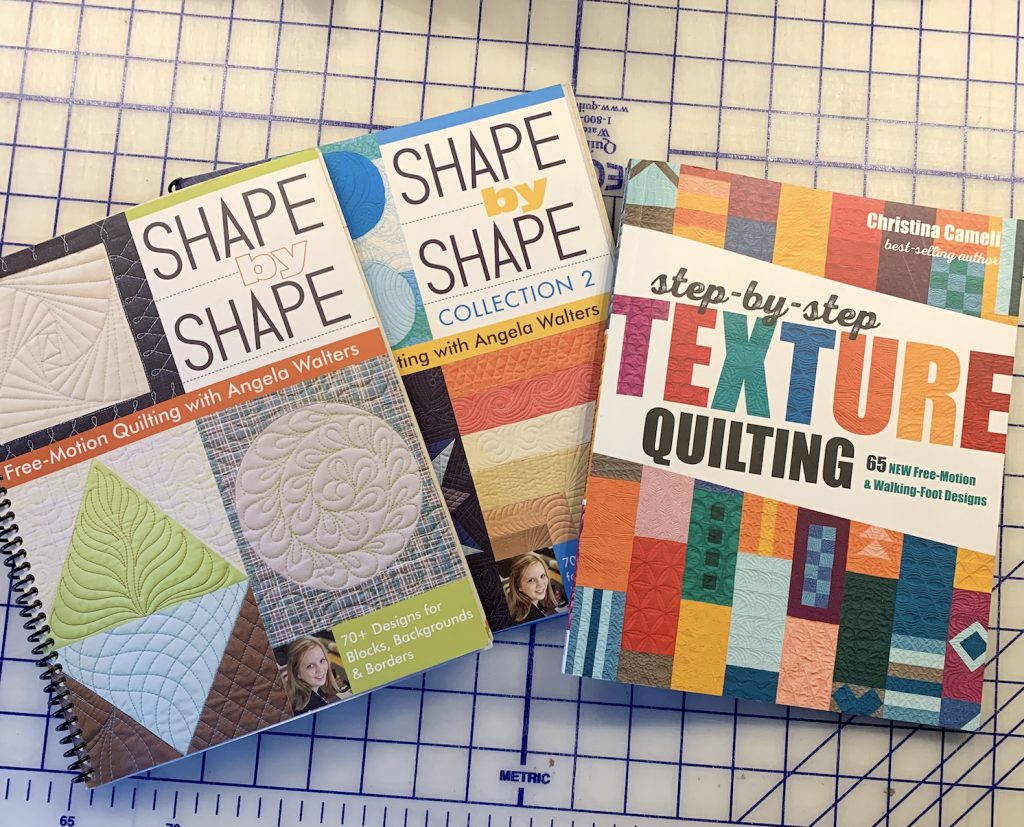
Books
I really don’t have that many quilting books, but I used these three books constantly. I had the 2 Shape by Shape Angela Walters books spiral bound at Kinko’s and it was really worth it. I’m considering doing that with Christina Cameli’s Texture book as well.
I hope these tips are helpful – let me know your thoughts! I’ll keep working on Part 2 – problems and solutions.
A nice article. I enjoyed the various tips. I have a lot to learn with best tips for marking and centering my projects. I can’t quite visualize how to incorporate the washi but once I load for the first time on my own, I know it will make a difference in understanding the different techniques.
Thanks Charlene. I’ll take some better photos and explain the washi tape better in part 2.