Welcome back for my second Cloud9 block. Yesterday I showed you the ‘official’ block that I designed and made for the blog hop. While making that block I was playing with another design, so I decided to make that one too. I did send the first block (Abstract Cabin) to Cheryl of Meadow Mist Designs to be included in the group charity quilt, but I had enough fabric to make the blocks for my mini quilt.
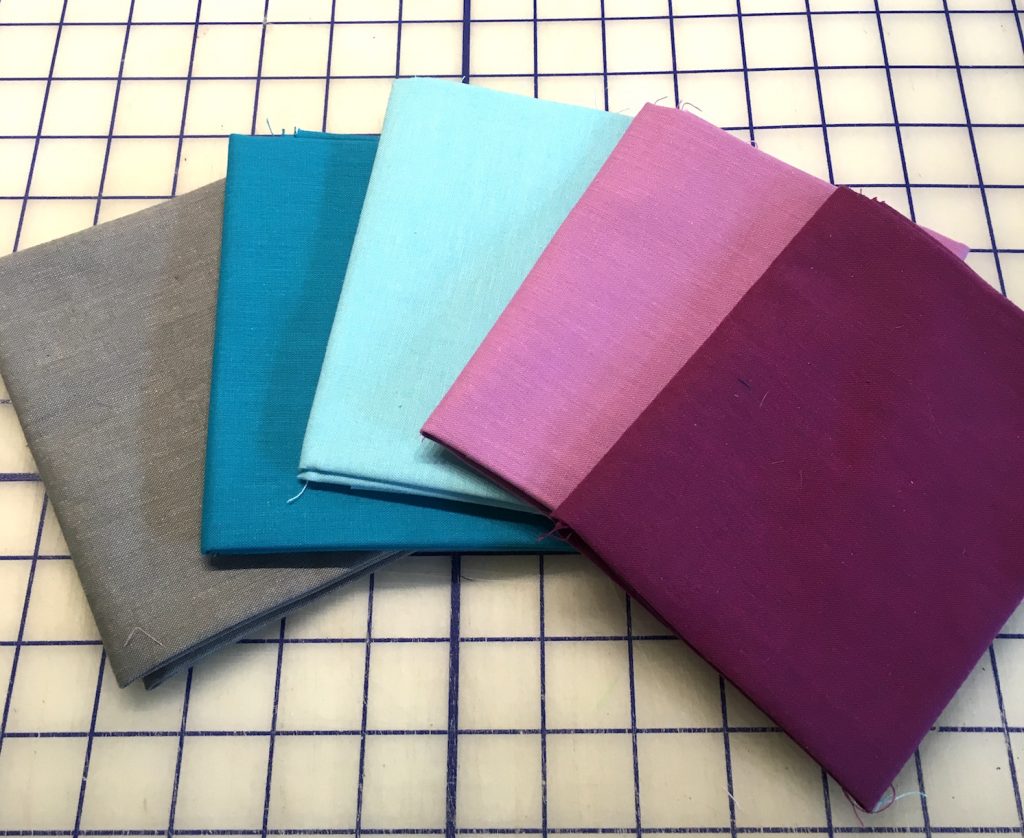
As a reminder, here is the beautiful Cloud9 fabric:
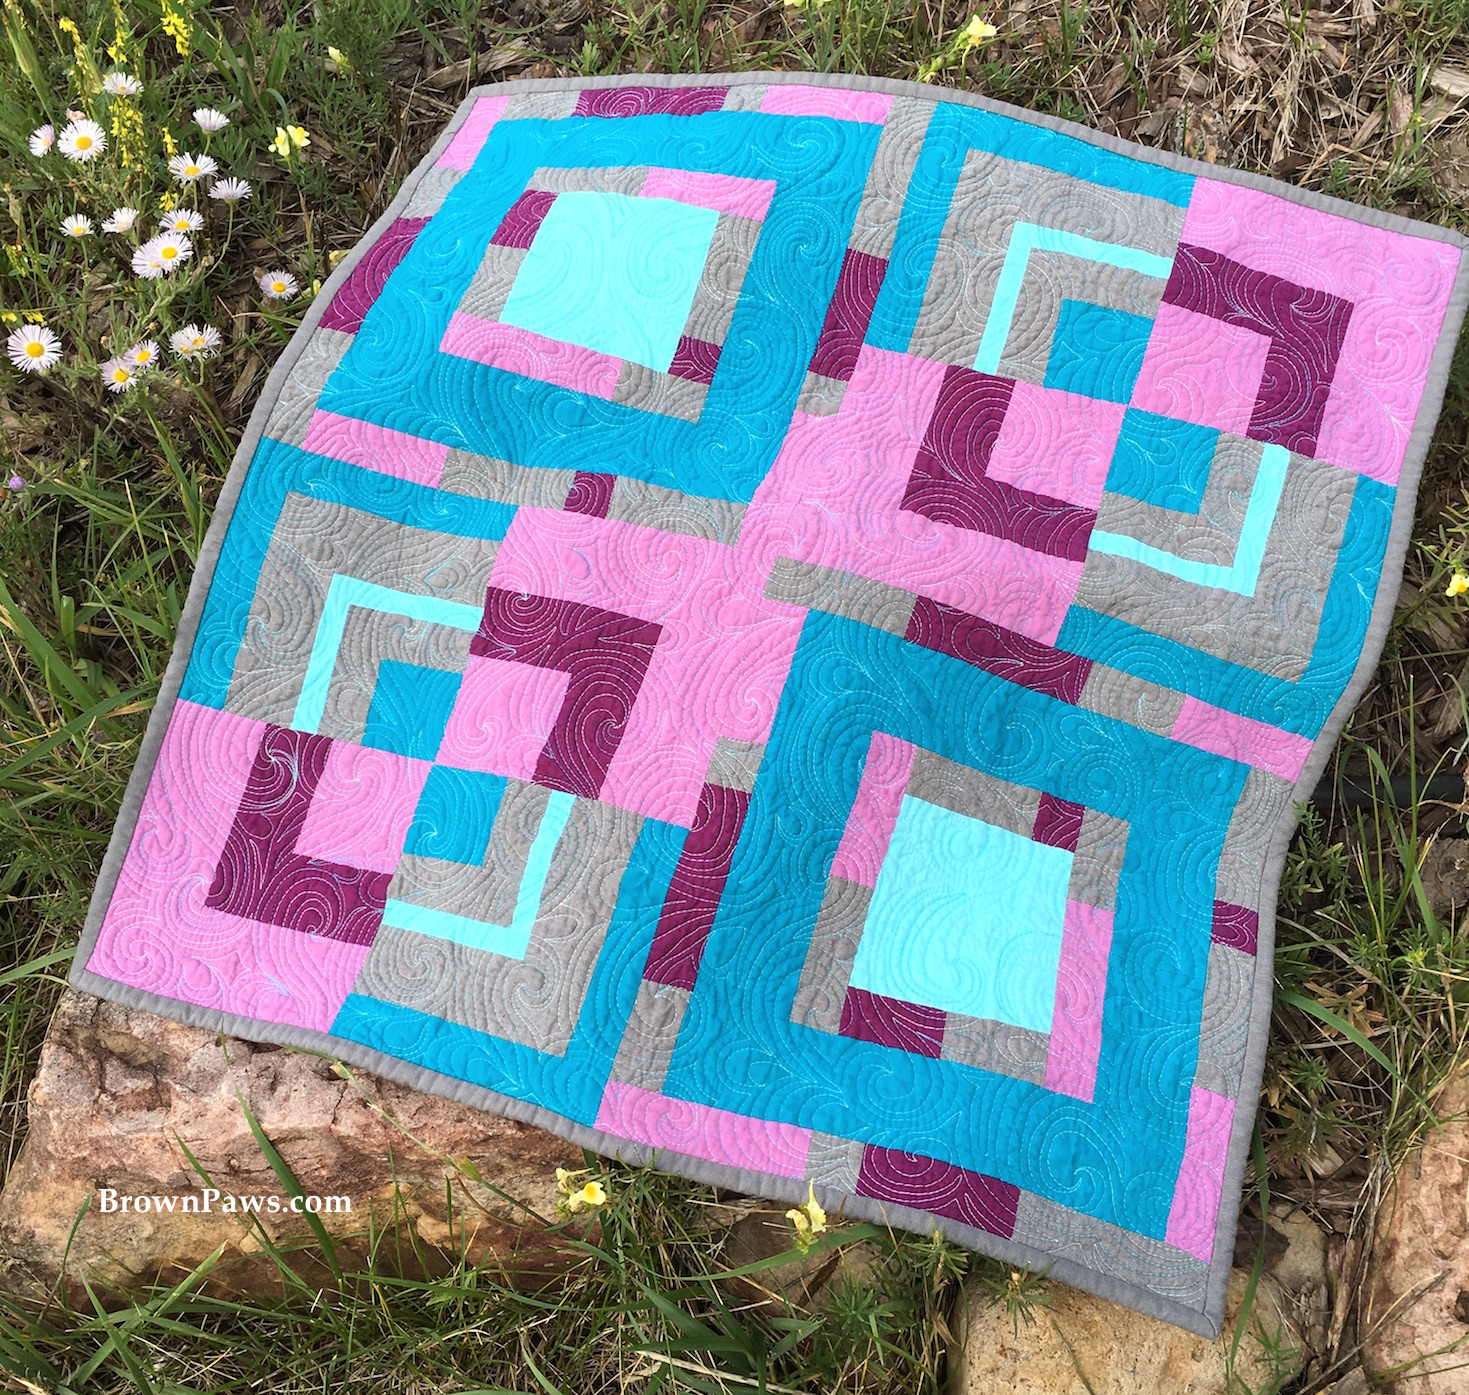
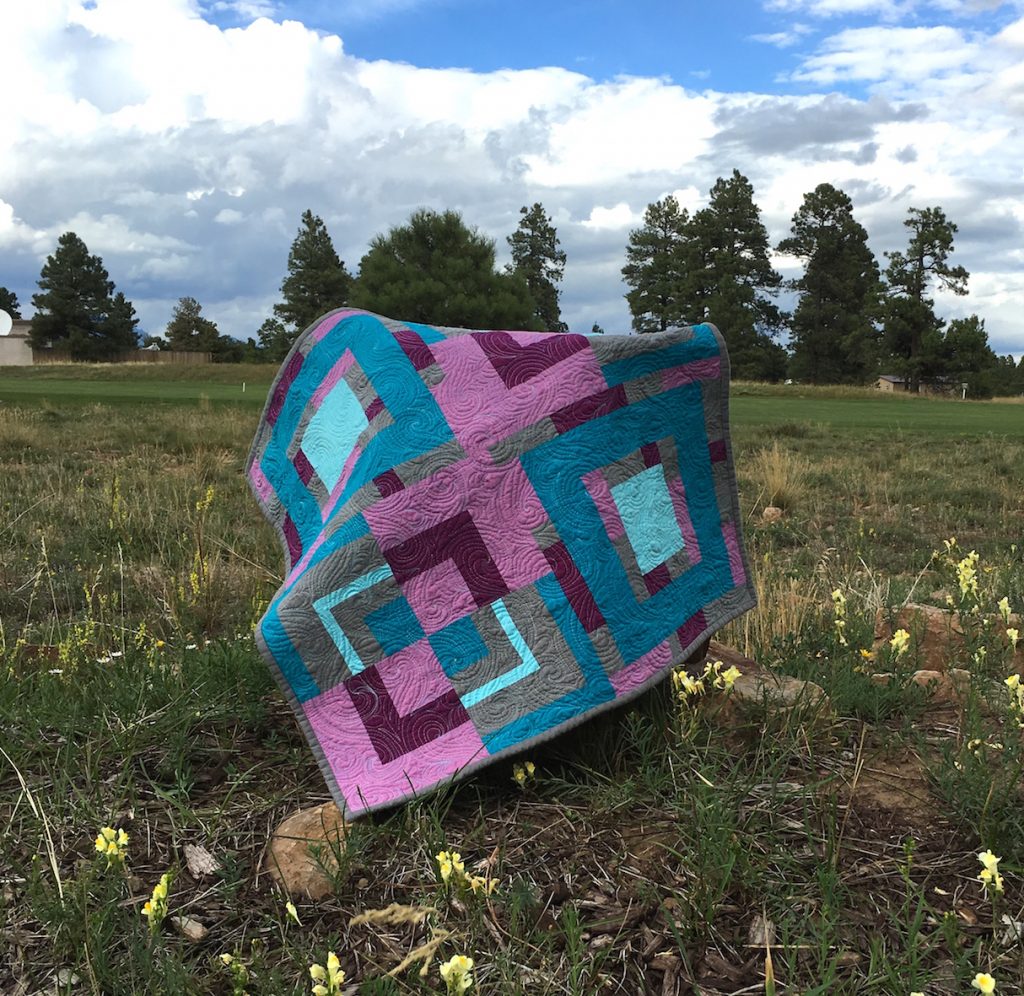
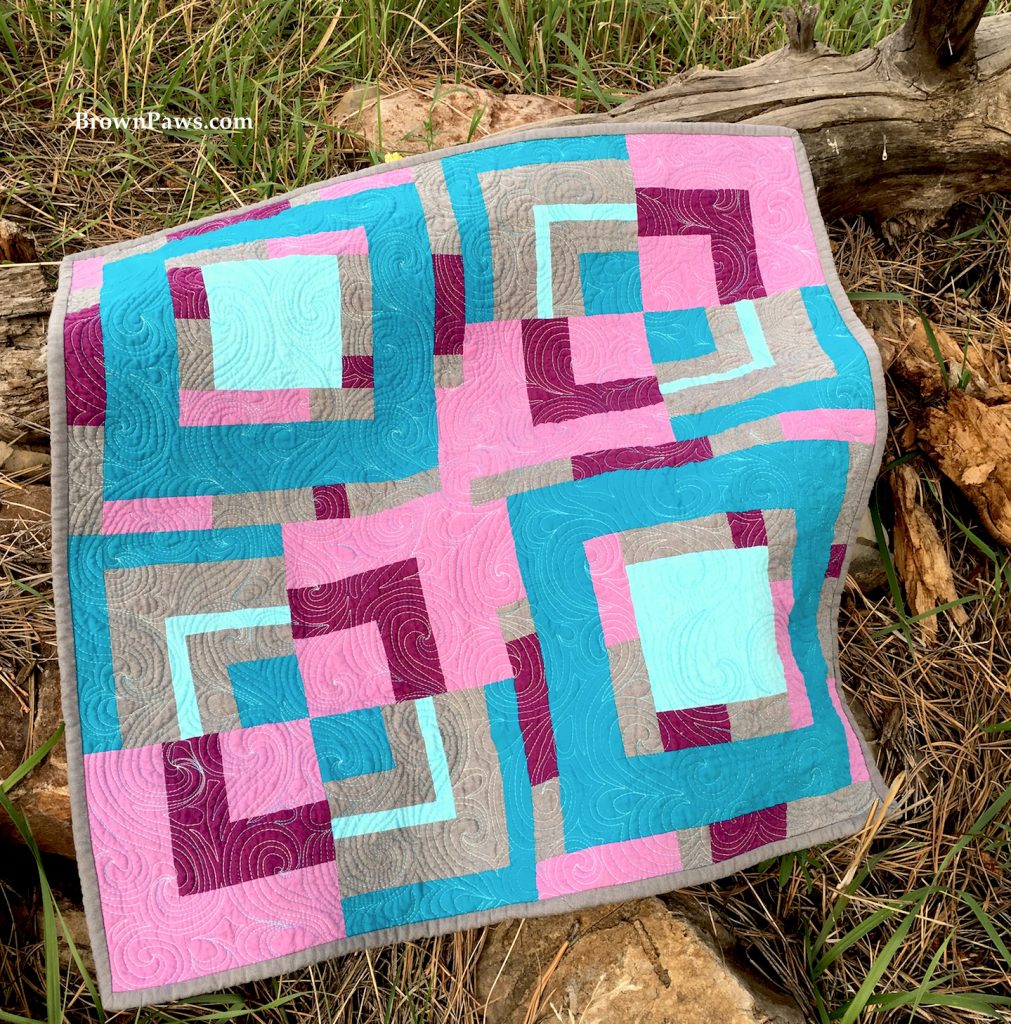
Here is the mini quilt from my 2 blocks. Both are 12″ blocks, so this quilt is 24″x24″.
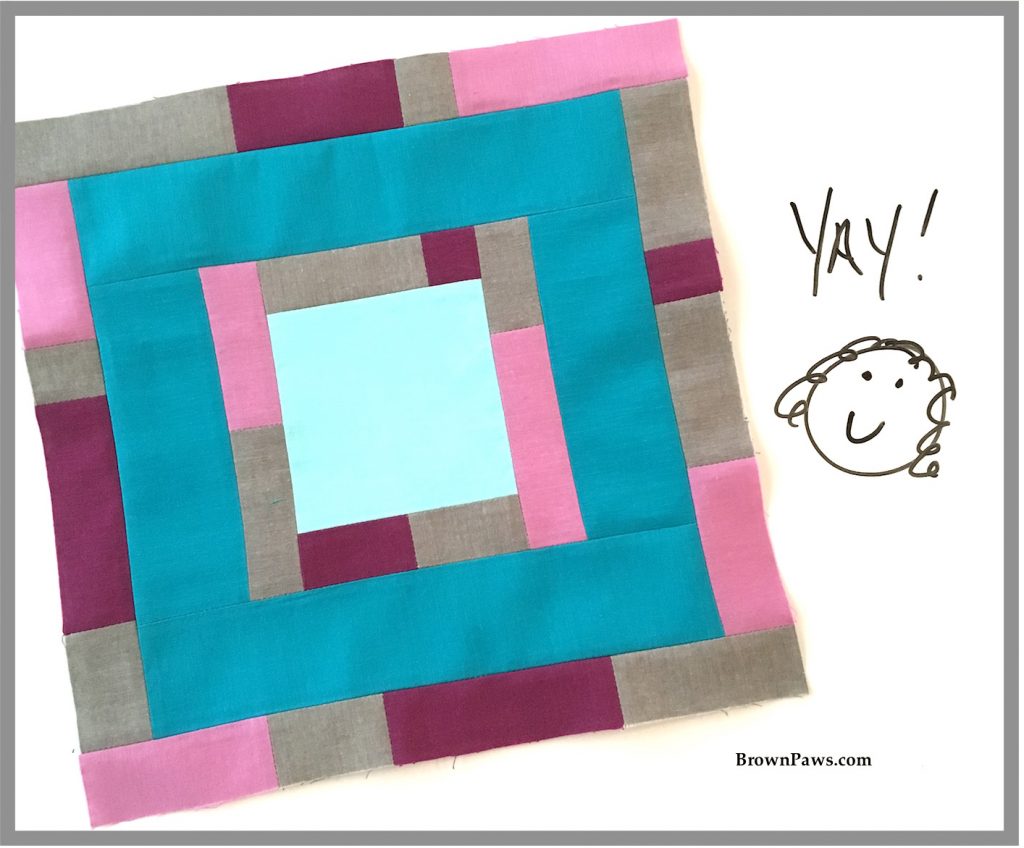
I’m calling the second block ‘Strippy Squares”:
Let’s get started!
Some General Notes:
- The block finishes at 12″, or 12.5″ unfinished
- I am assuming 1/4″ seam allowances throughout
- For fabric quantity, I used the bundle of fat quarters that were sent to us. However you don’t need the full fat quarter of any of the colors. If you cut carefully, you could probably do this with some larger scraps.
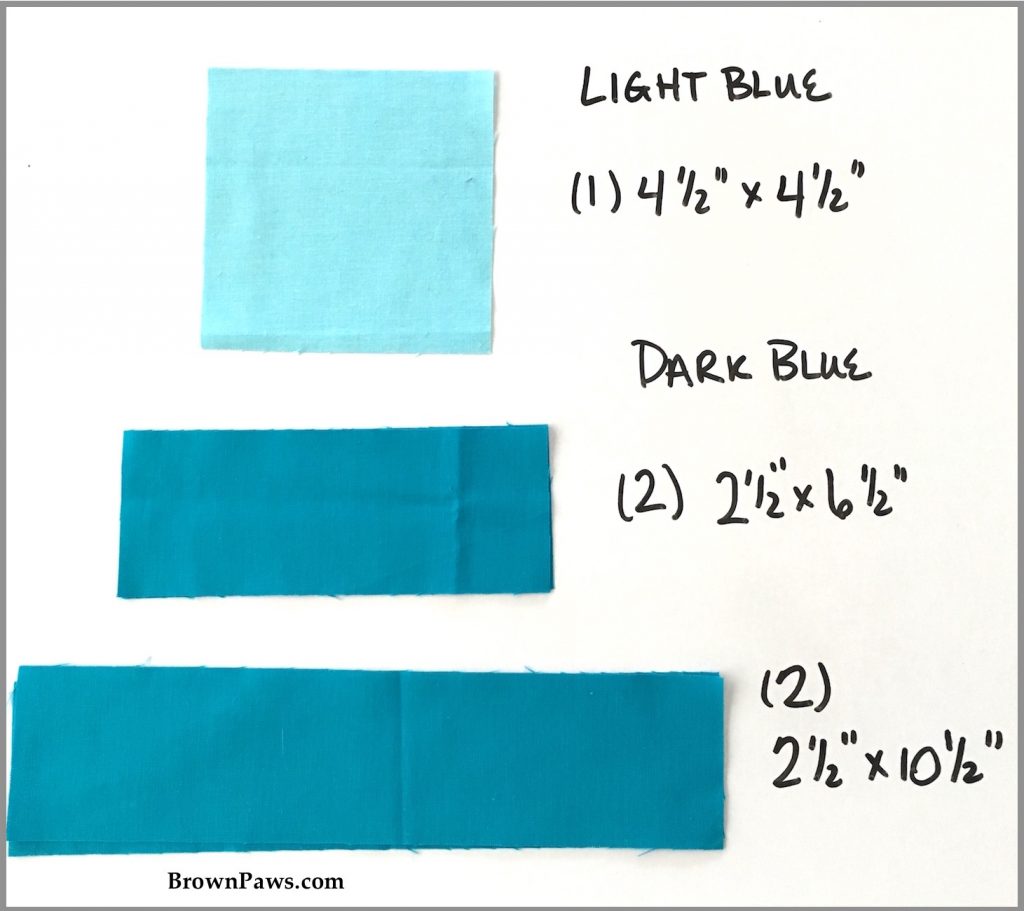
First cut the blues:
The photo shows the size to cut, and the number of pieces to cut of that size in (). For example, the first section below says to cut one (1) 4 1/2″ x 4 1/2″ square from the light blue fabric, two (2) 2 1/2″ x 6 1/2″ and two (2) 2 1/2″ x 10 1/2″ rectangles from the dark blue fabric.
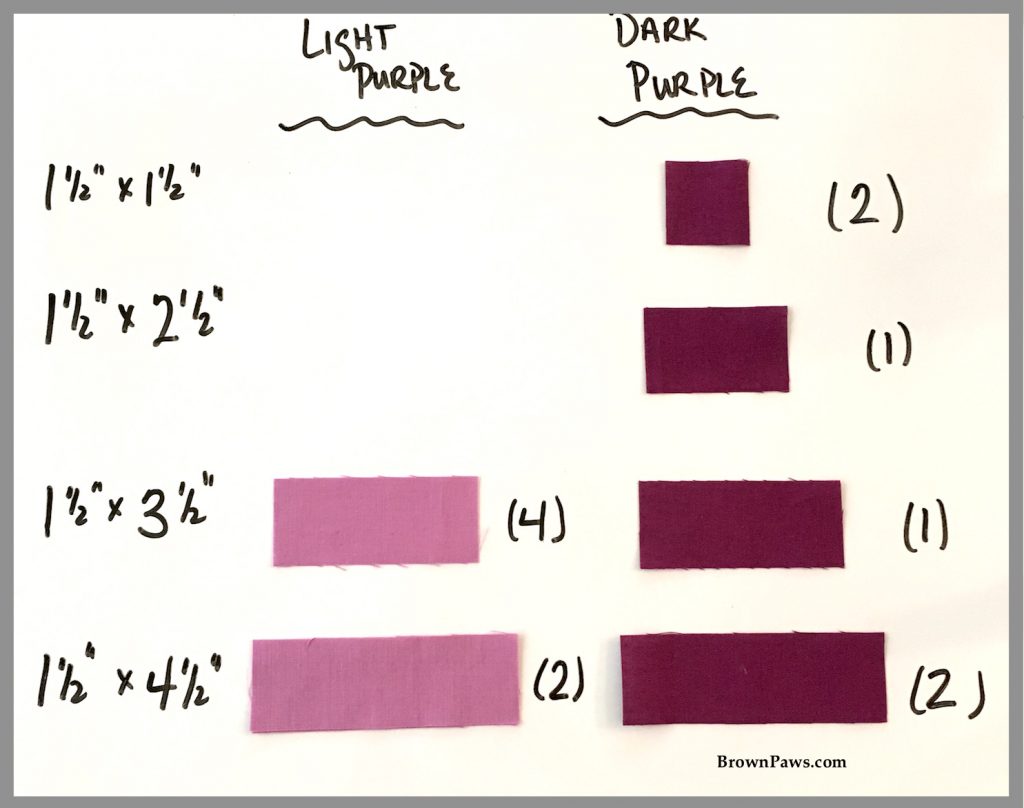
Then the Purples:
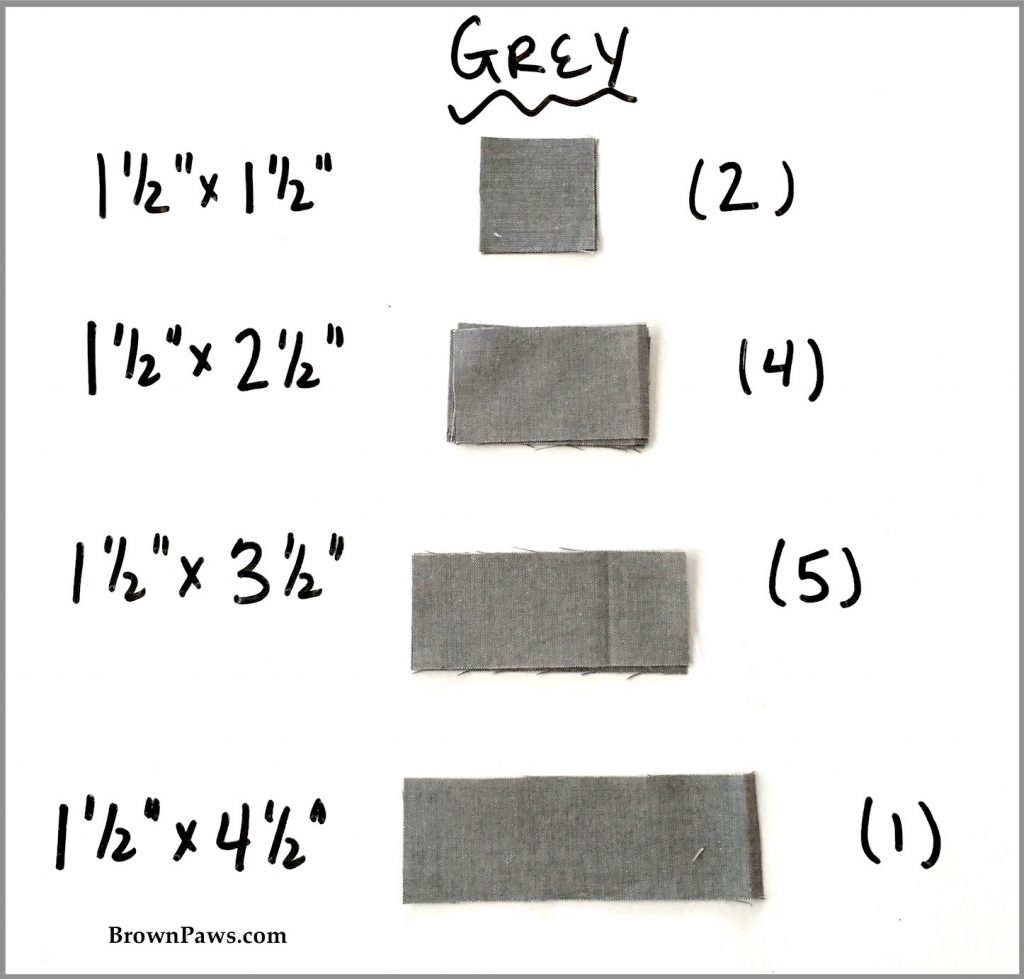
And then the Grey:
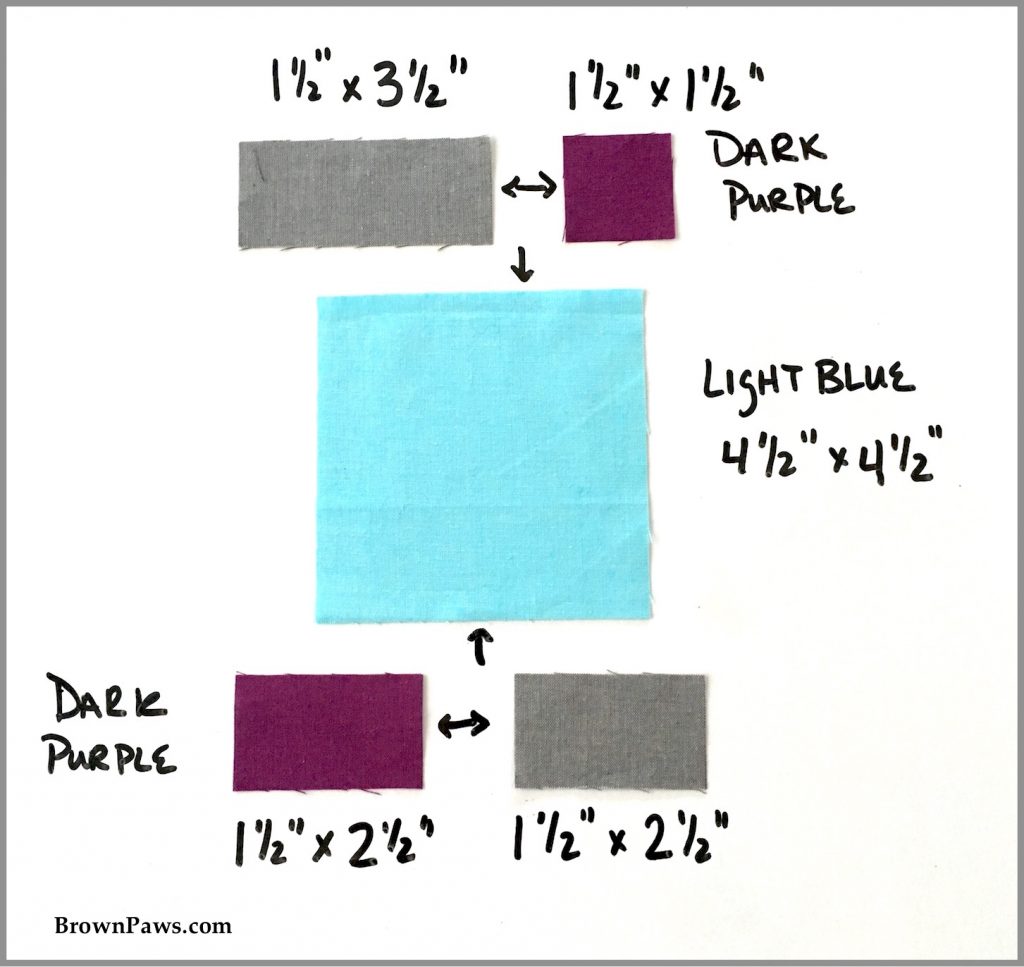
Next we’ll work on the strips that go around the inner light blue square.
Step 1:
Join one dark purple 1 1/2″ square with one grey 1 1/2″ x 3 1/2″ rectangle (purple on the RIGHT). Press the seam. You can press the seam open or to the sides – whichever you prefer.
Next join one dark purple 1 1/2″ x 2 1/2″ rectangle with one grey 1 1/2″ x 2 1/2″ rectangle (purple on the LEFT). Press the seam.
Once the strips are together, join the strip with the 1 1/2″ square strip unit to the top of the light blue 4 1/2″ square. Press the seam. Join the strip with the 2 1/2″ rectangles to the bottom of the light blue square. Press this seam.
Step 2:
Join one light purple 1 1/2″ x 3 1/2″ rectangle with one grey 1 1/2″ x 3 1/2″ rectangle (purple on the TOP). Press the seam.
Next join one light purple 1 1/2″ x 2 1/2″ rectangle with one grey 1 1/2″ x 4 1/2″ rectangle (purple on the BOTTOM). Press the seam.
From here, it is helpful to always orient the block that you are building so that the 1 1/2″ dark purple square is on the top.
Once the strips are together, join the strip with the 1 1/2″ x 3 1/2″ purple rectangle strip unit to the left of the light blue 4 1/2″ square. Press the seam. Join the strip with the longer light purple rectangle on the bottom to the right of the light blue square. Press this seam.

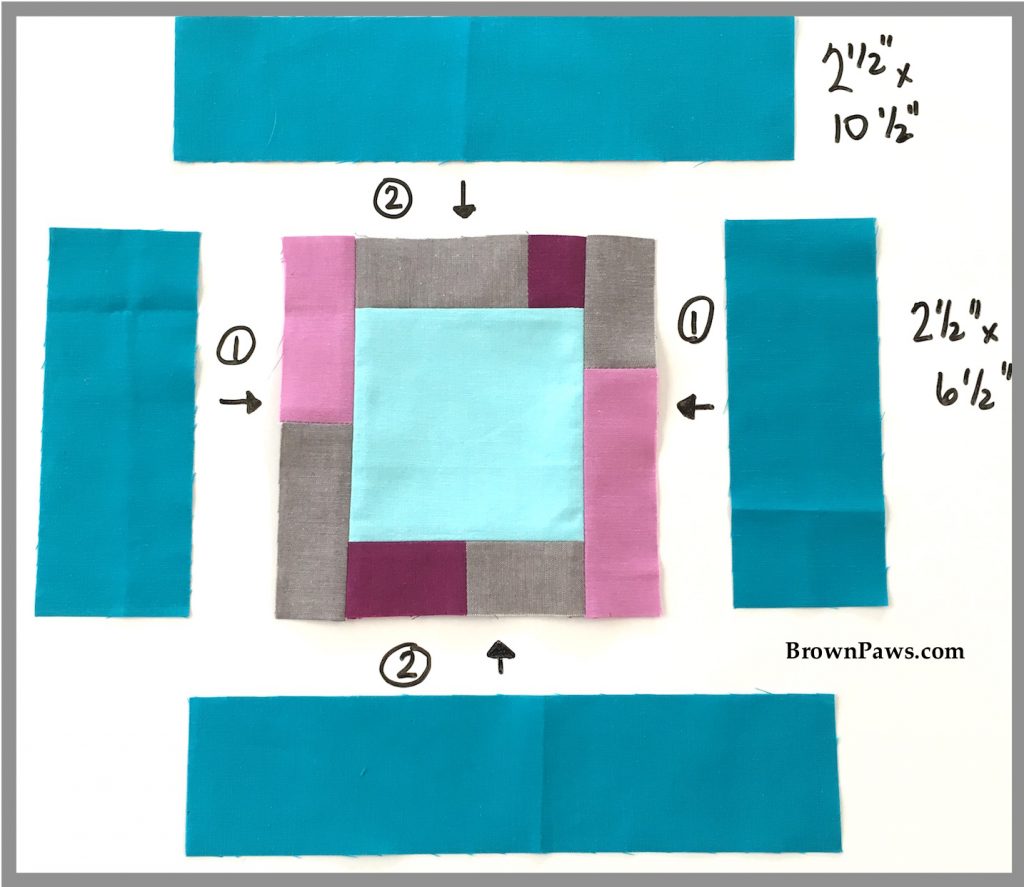
Step 3:
Join the 2 1/2″ x 6 1/2″ darker blue rectangles to the sides of the block – press the seams.
Join the 2 1/2″ x 10 1/2″ darker blue rectangles to the top and bottom of the block – press the seams.
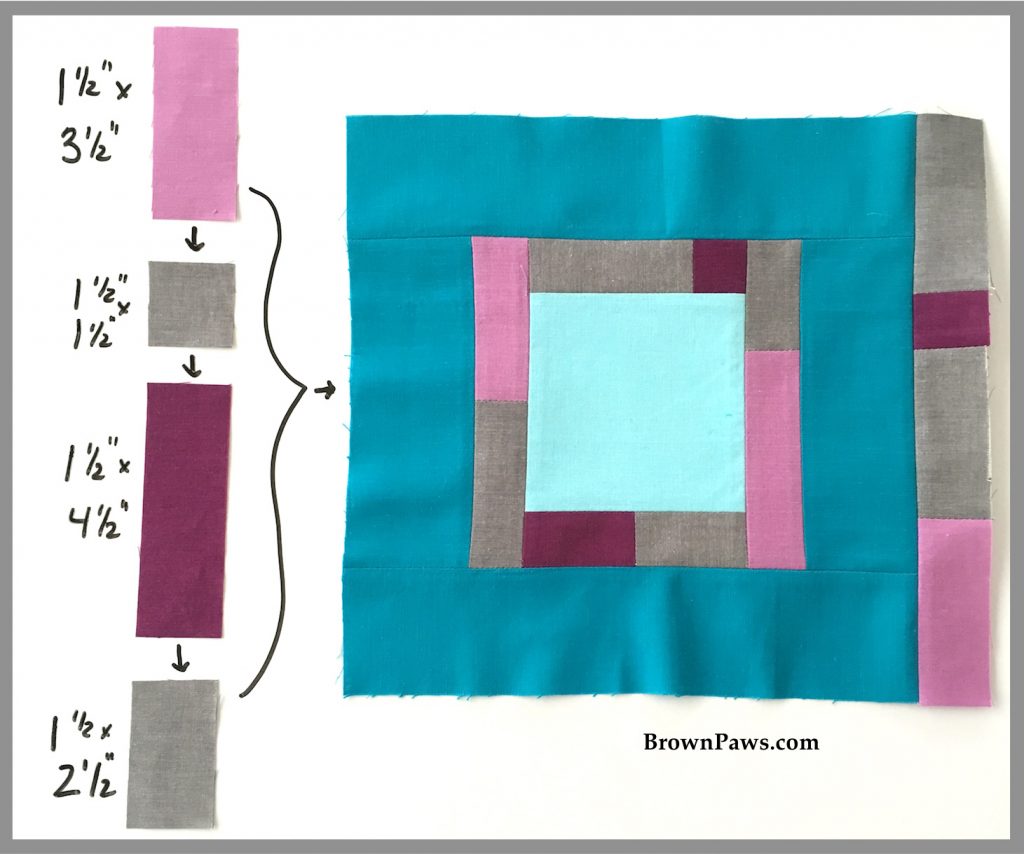
Step 4:
Join one grey 1 1/2″ x 3 1/2″ rectangle to one dark purple 1 1/2″ square, and a second grey 1 1/2″ x 3 1/2″ rectangle with a light purple 1 1/2″ x 3 1/2″ rectangle. Join these two units as shown in the photo. Press the strip, and then join it to the right of the block. Press the seam.

Step 5:
Join one light purple 1 1/2″ x 3 1/2″ rectangle to one grey 1 1/2″ square, and a dark purple 1 1/2″ x 4 1/2″ rectangle with a grey 1 1/2″ x 2 1/2″ rectangle. Join these two units as shown in the photo. Press the strip, and then join it to the left of the block. Press the seam.
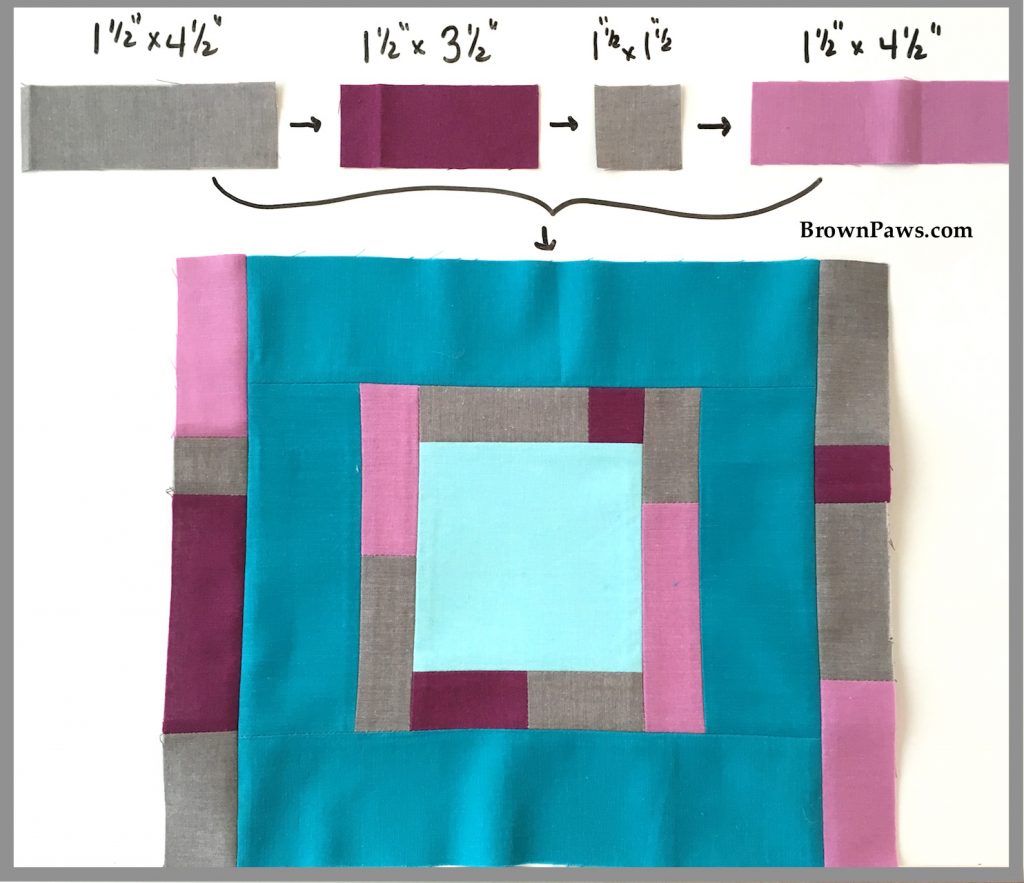
Step 6:
Join one grey 1 1/2″ x 4 1/2″ rectangle to one dark purple 1 1/2″ x 3 1/2″ rectangle, and a one grey 1 1/2″ square with a light purple 1 1/2″ x 4 1/2″ rectangle. Join these two units as shown in the photo. Press the strip, and then join it to the top of the block. Press the seam.
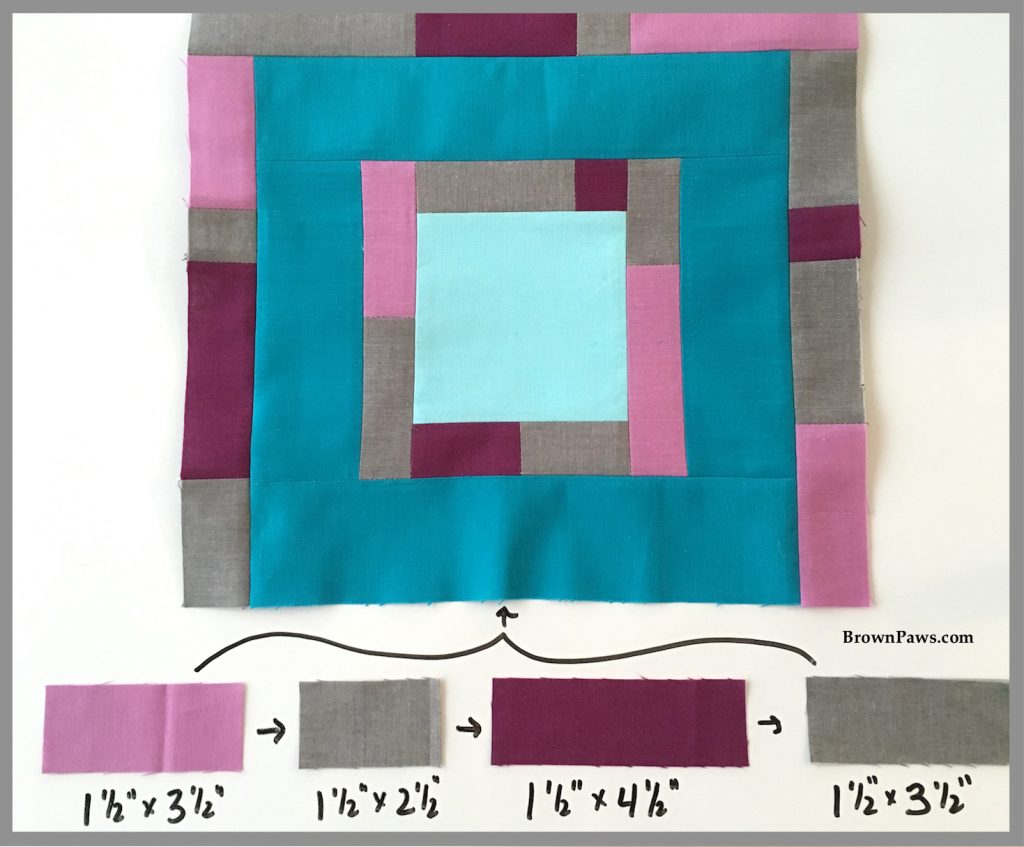
Step 7:
Join one light purple 1 1/2″ x 3 1/2″ rectangle to one grey 1 1/2″ x 2 1/2″ rectangle, and a dark purple 1 1/2″ x 4 1/2″ rectangle with a grey 1 1/2″ x 3 1/2″ rectangle. Join these two units as shown in the photo. Press the strip, and then join it to the bottom of the lock. Press the seam.
And the block is done!!
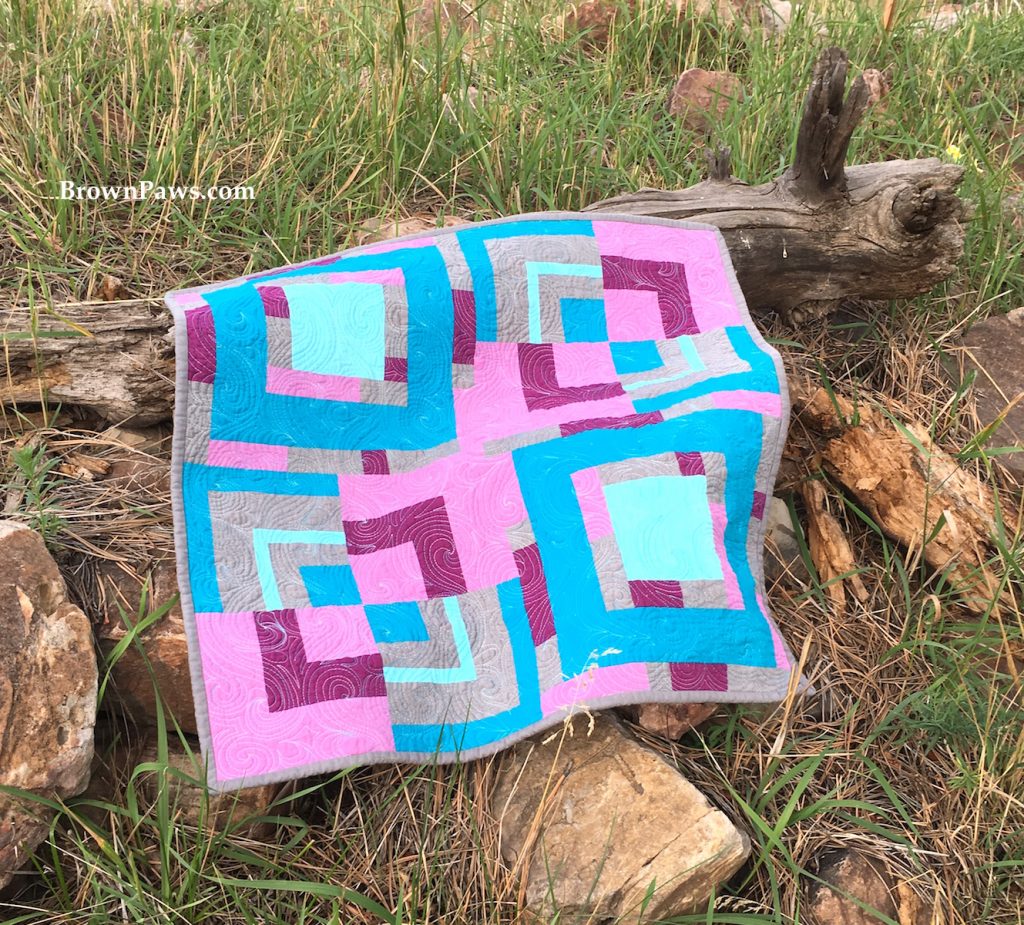
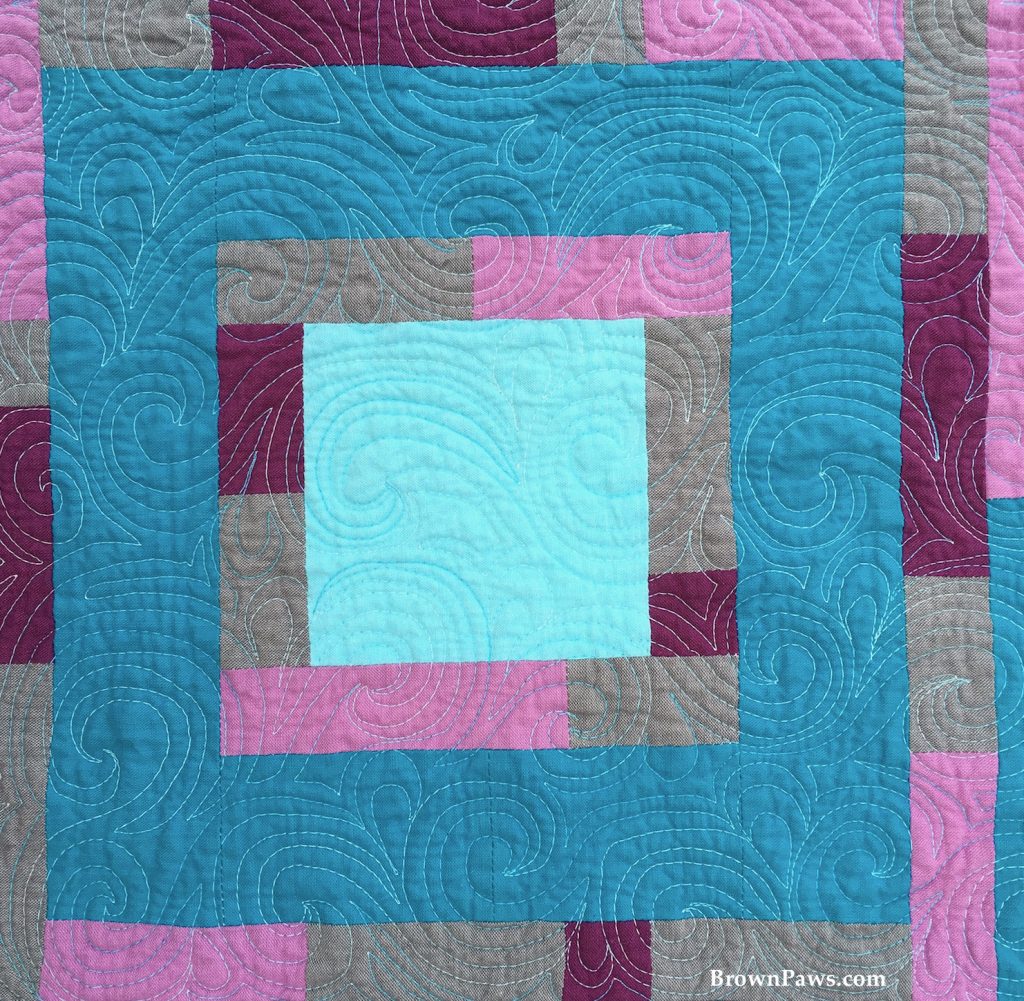
Here are some more photos of the finished mini quilt. I’ve been doing a lot of practice with some rolling swirls that I think I want to use on another quilt I’m working on.
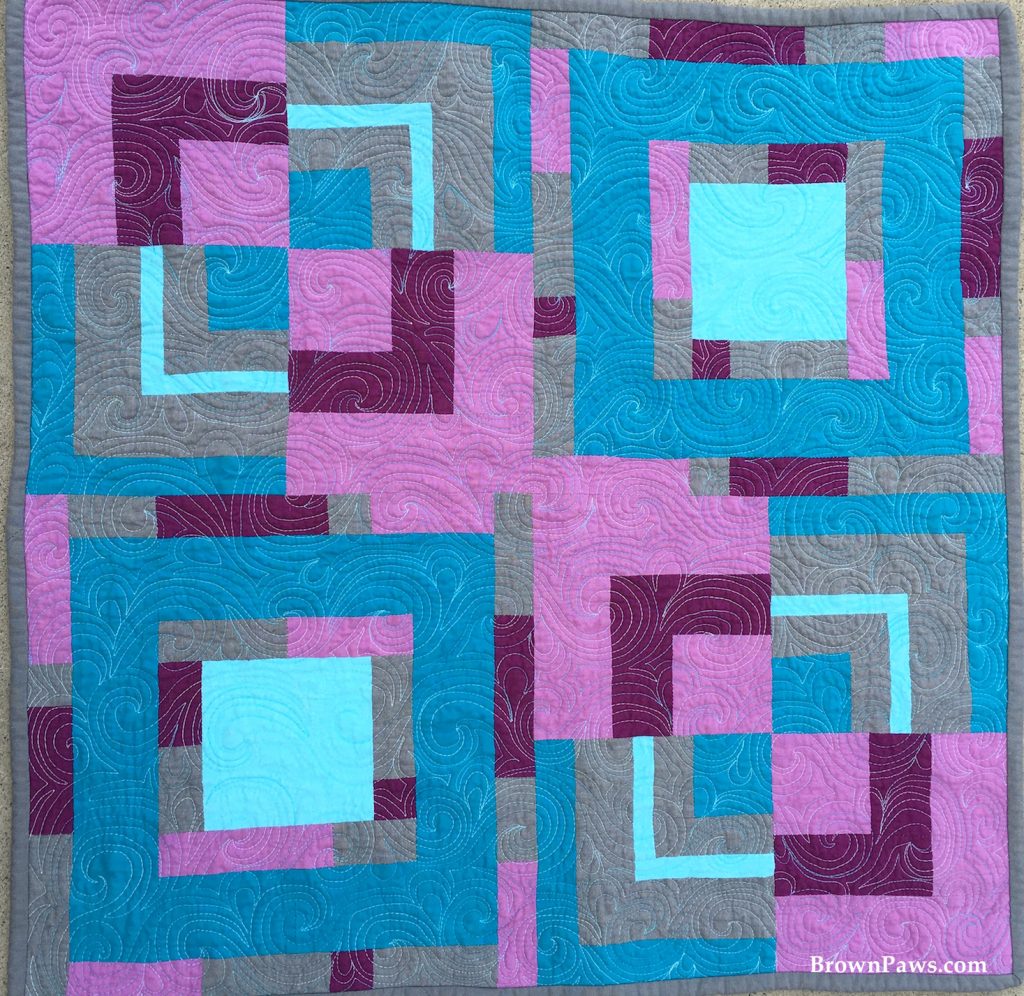
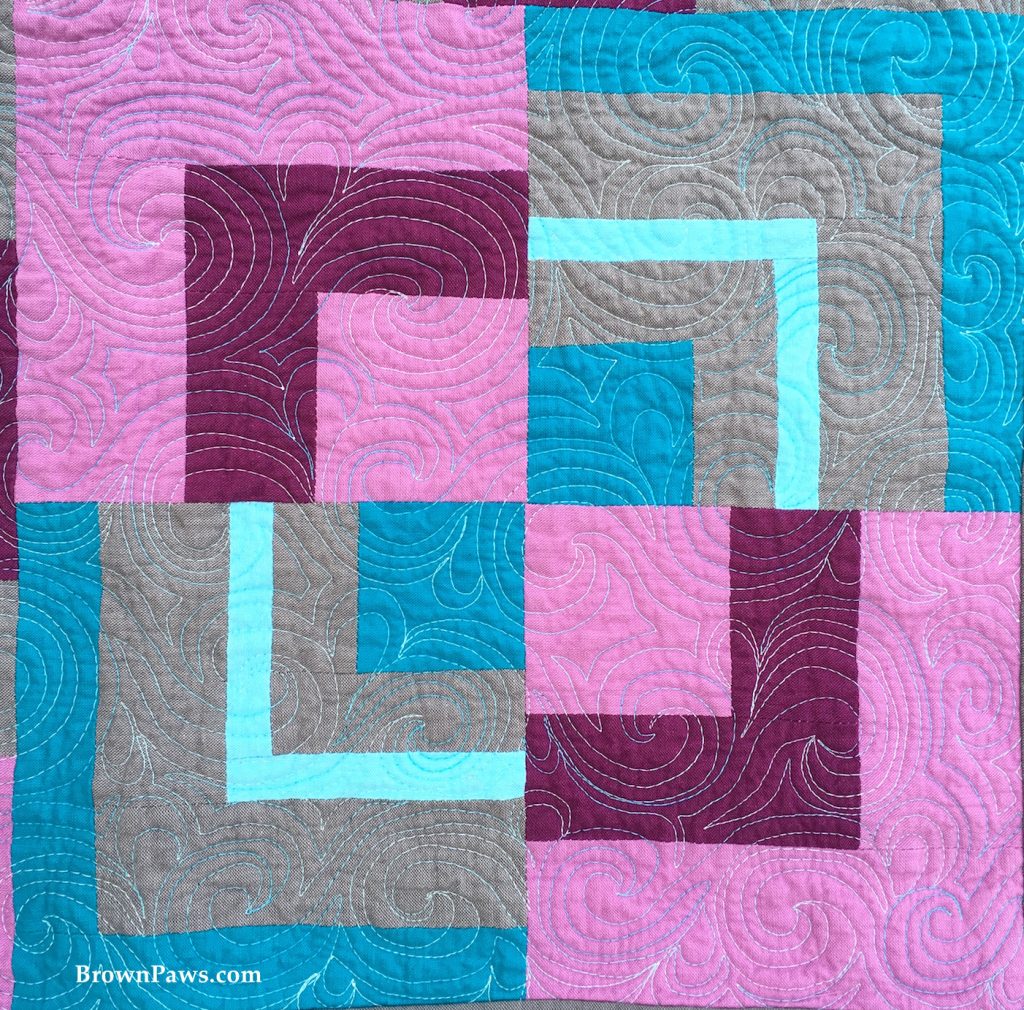
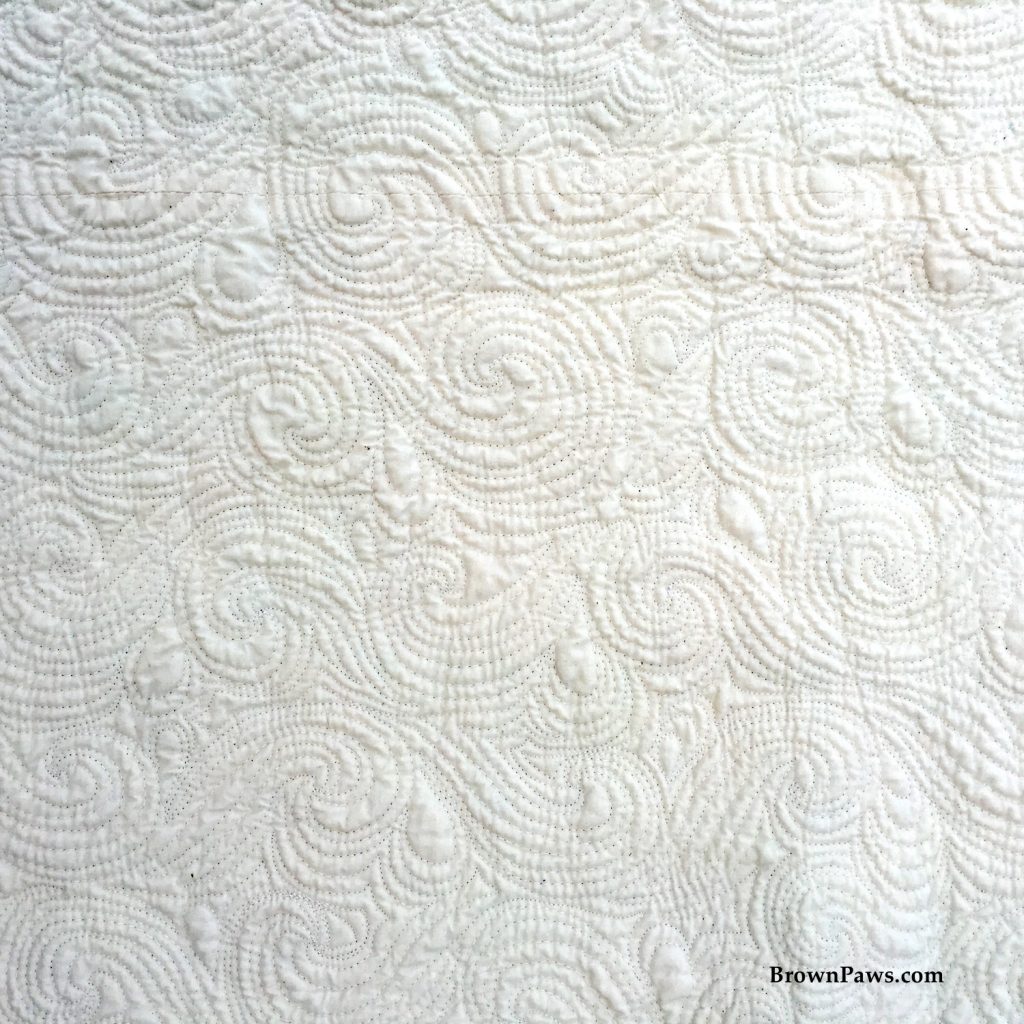
Here are some detailed pictures of the quilting. I used Aurifil 4663 (Baby Blue Eyes – a variagated blue and white) on the front of the quilt and Aurifil 2311 (Muslin) on the back.
and the detail on the back:
This was a fun project. I had a good time designing the blocks – though it was a challenge! I also really like the way the mini quilt came out, and the opportunity it gave me to practice my swirls.
Some of the other folks on the blog hop did cool things with using various programs to make their pattern/tutorial, and then turning that pattern into a downloadable pdf file. I think I will give that a try – let me know if you are interested – if you are, I’ll move it up on my priority list!
I hope you enjoyed the blocks and the quilt!
I like this block too. Together they make a great mini!
Thanks Velda! I’m so glad that you came back today. I’m really happy with my mini!
I like them both…and I forgot to say yesterday that I like the YaY! in your tutorials. It’s very enthusiastic!
Thanks Lisa – so glad you came back today. After designing the blocks, doing the samples, and doing the tutorials I was so happy a big YAY seemed in order!! I was feeling pretty enthusiastic!
Beautiful quilt-amazing block! Thank you, Susan
Thanks for coming back today Susan! Glad you liked the quilt and the block.
I really like each block, and I like the quilt you made with them together. Your quilting looks great! Thank you for little details like the thread you used, and for making the instructions so clear.
Thanks Susan. I was really happy with how the quilt turned out – I worked really hard on that quilting! 🙂
I really like this block aswell Ann! Your mini has turned out beautifully and the quilting is great!!